• Skip to primary navigation
  • Skip to main content

Pies & Prejudice

Adventures of a Geeky Pie Baker

  • About
  • My Geeky Pies
  • My road trips

Writing

New Blog, Road Trips & A Tribute to my Aunt Colleen

May 18, 2019 by Pies & Prejudice 2 Comments

Warning: This post is gonna be a little long. You might wanna go grab a coffee first.

Hello friends! Good Morning & happy weekend. I hope you’re doing fabulously. I’m a bit overdue for a post on here, I guess it has been awhile.

I hope all of you who are Moms had a wonderful Mother’s Day this past weekend. It was my first one without my mom, so it was a bit of a tough day. Thanks to those of you who sent me note to say you were thinking of me, it meant so much xo. If your parents are still alive, hug them often, and spend as much time with them as you can. You’ll always remember all those precious times together. I’d give anything for another moment with either of my parents …

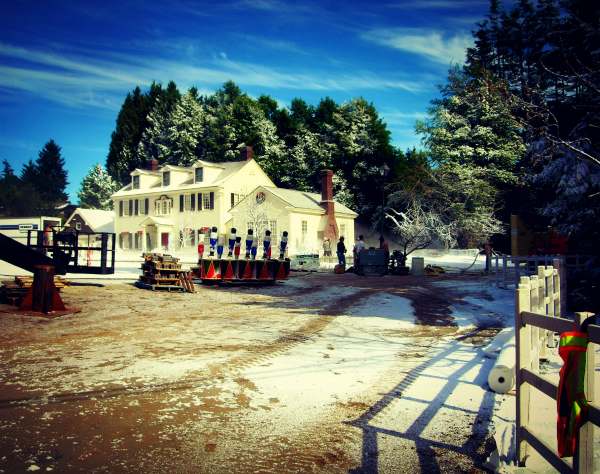
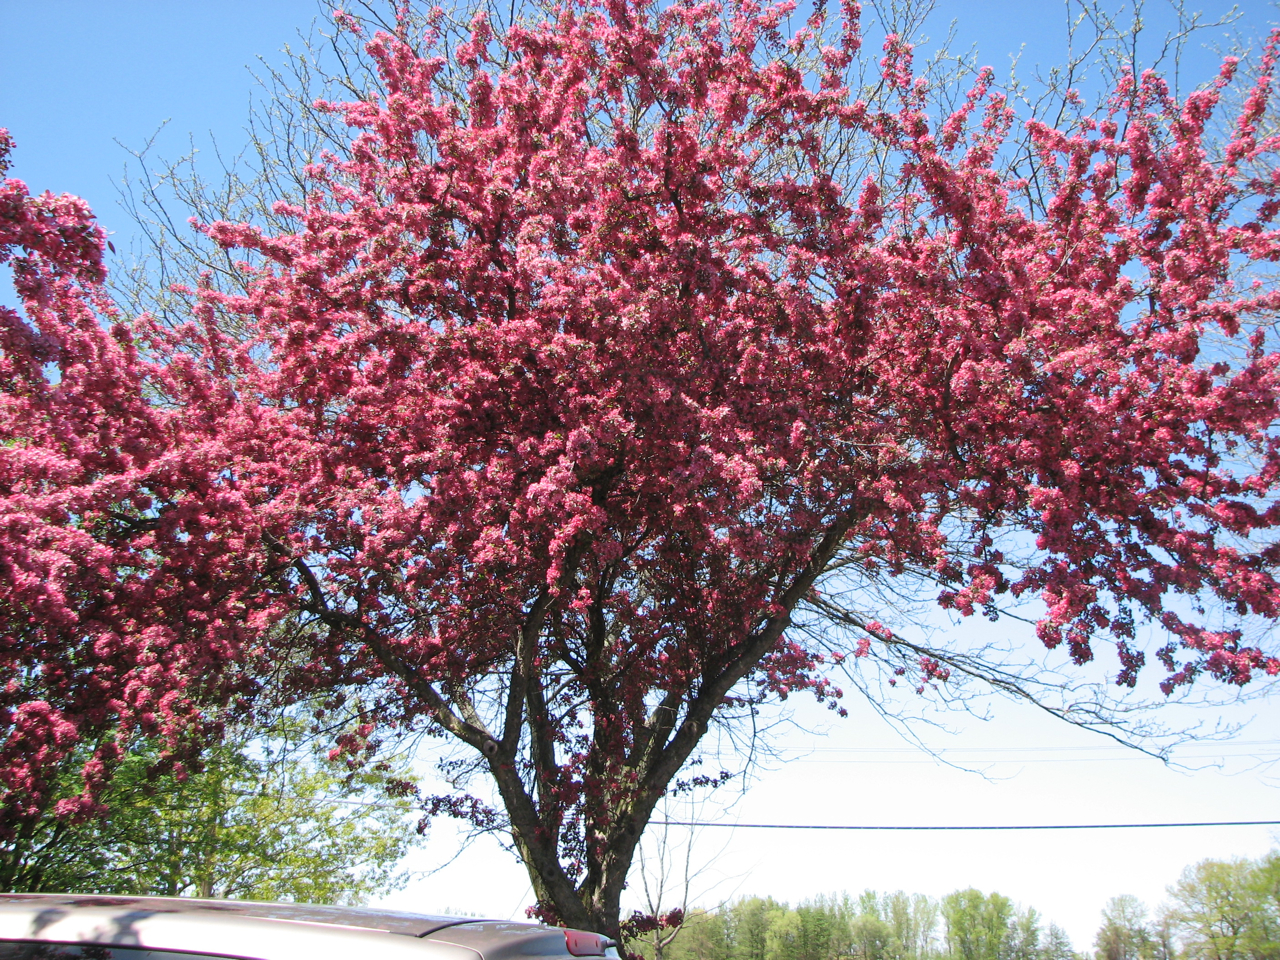
It is finally spring here in Ottawa (we had snow as recently as a couple of weeks ago!) but last week we got so much rain that our City recently declared a State of Emergency due to flooding warning– especially west of Ottawa (Dunrobin & Constance Bay), and also Gatineau.

I went to help with sandbagging last week in Constance Bay and it was amazing to see all the communities coming together to help out. As we filled the sandbags, the guys were taking them away as quickly as we were filling them!

We’re supposed to get some warmer weather and maybe even a little sunshine this weekend so that should help provide some relief to flood-prone areas.

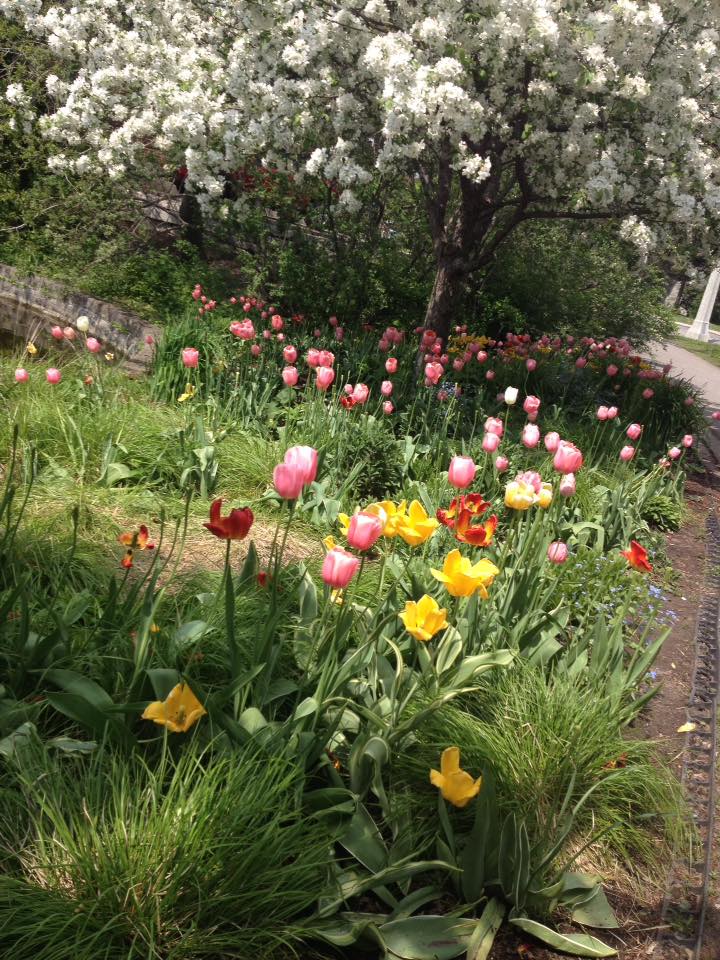
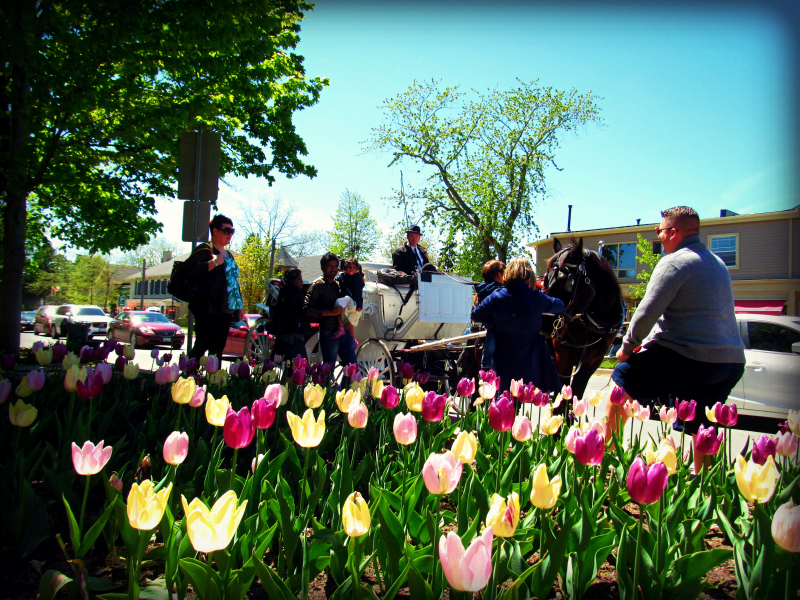
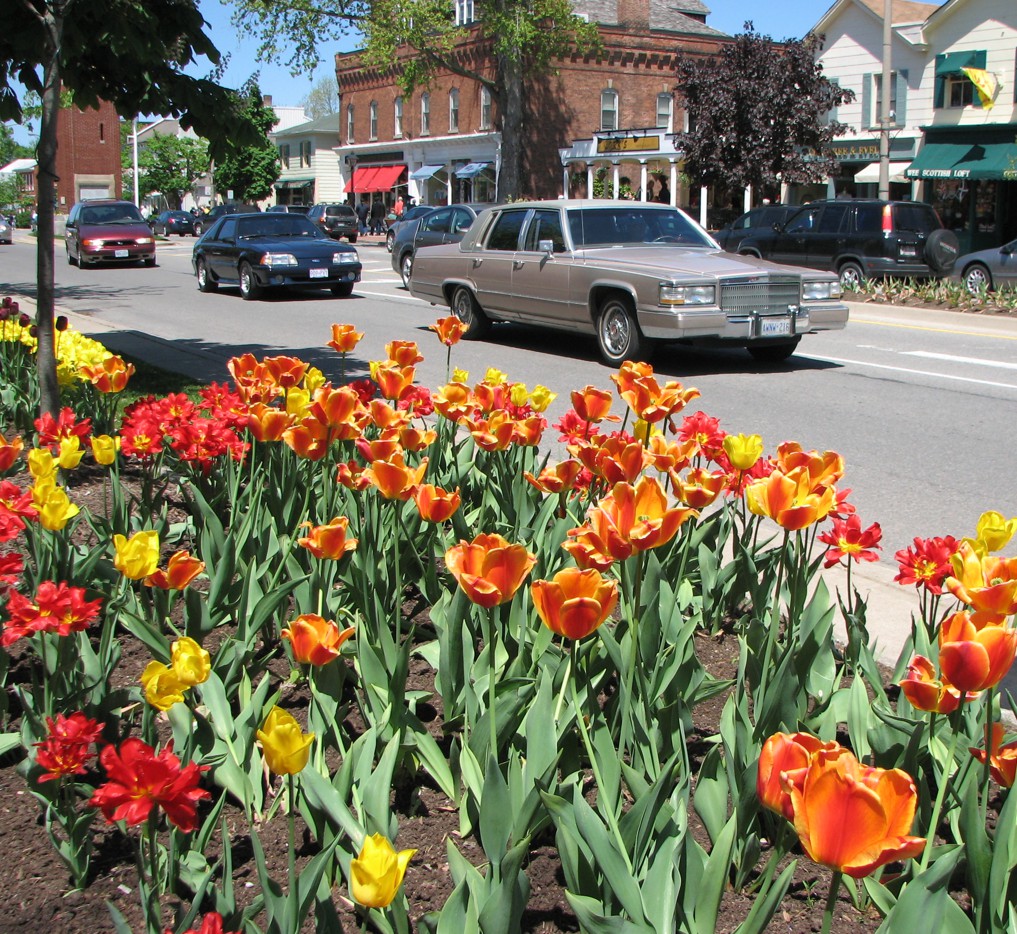
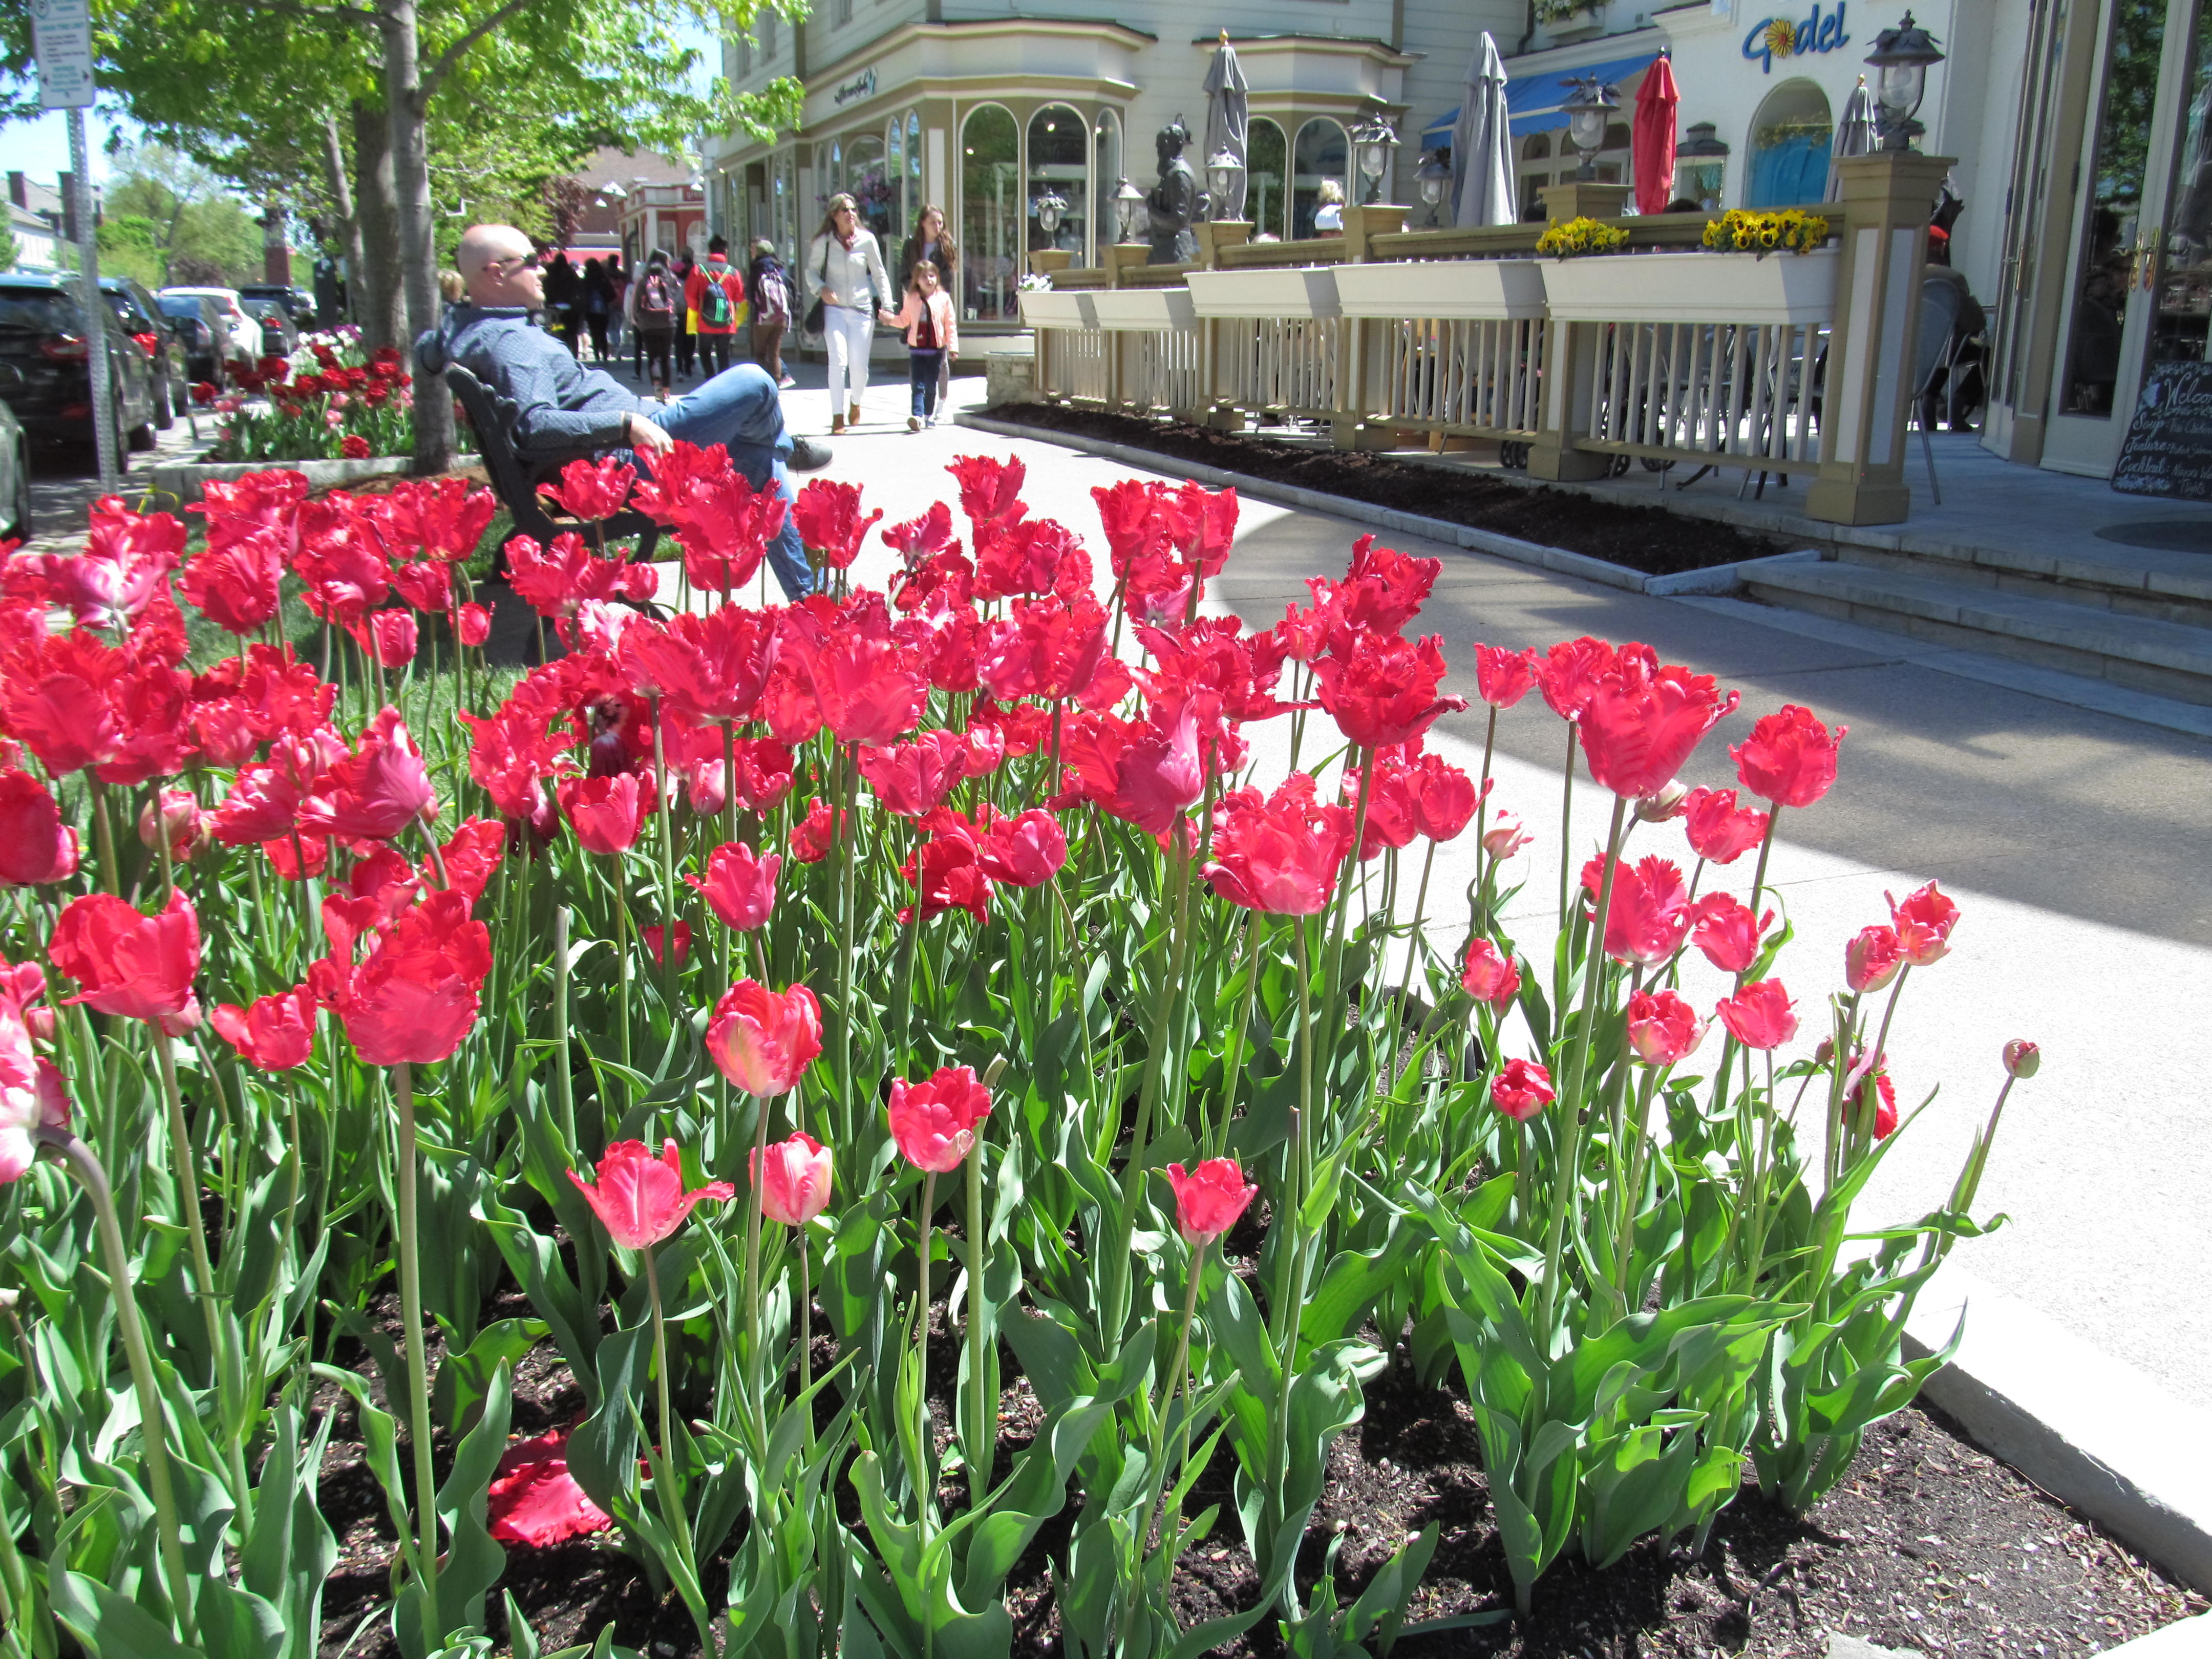
Our famous Tulip Fest also started last week. It’s the (only) festival that I really look forward to in my hometown so I’m pretty excited to see the tulips. I haven’t had a chance to check it out yet but I probably will this weekend. I wasn’t rushing because there aren’t a lot of flowers yet -as we’ve had a cold spring. But I’ll check out the tulip situation and report back soon…

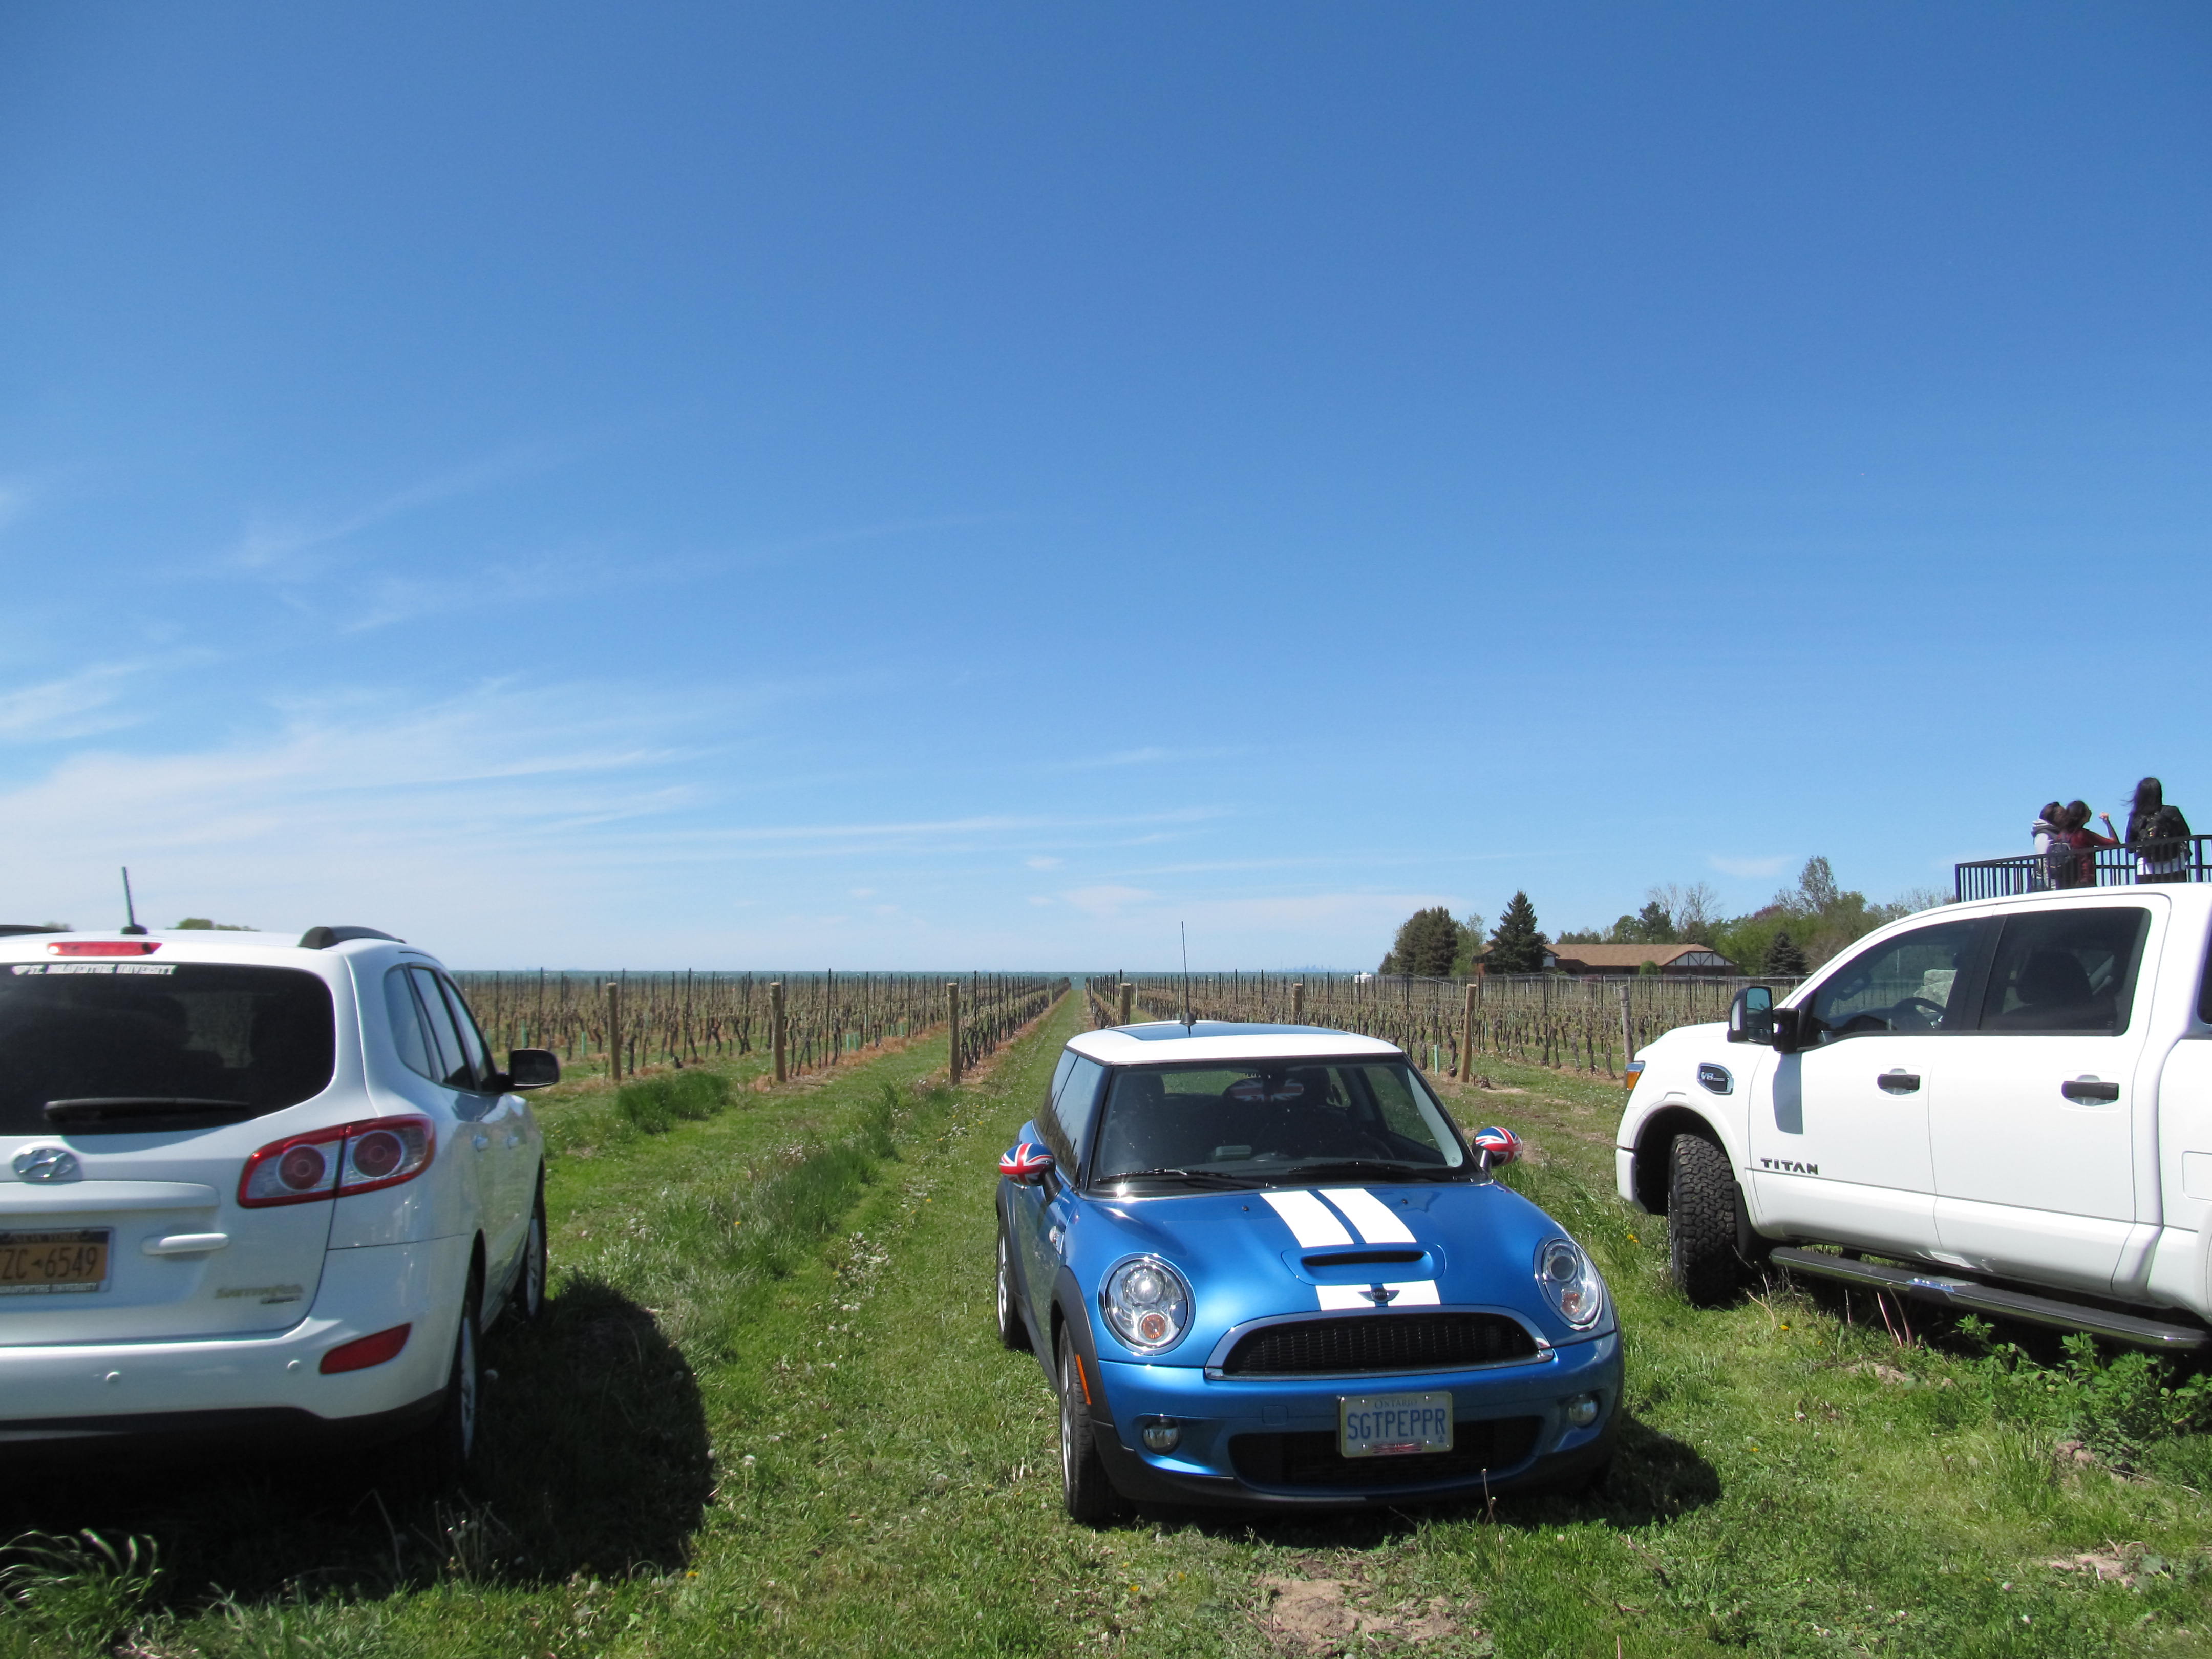
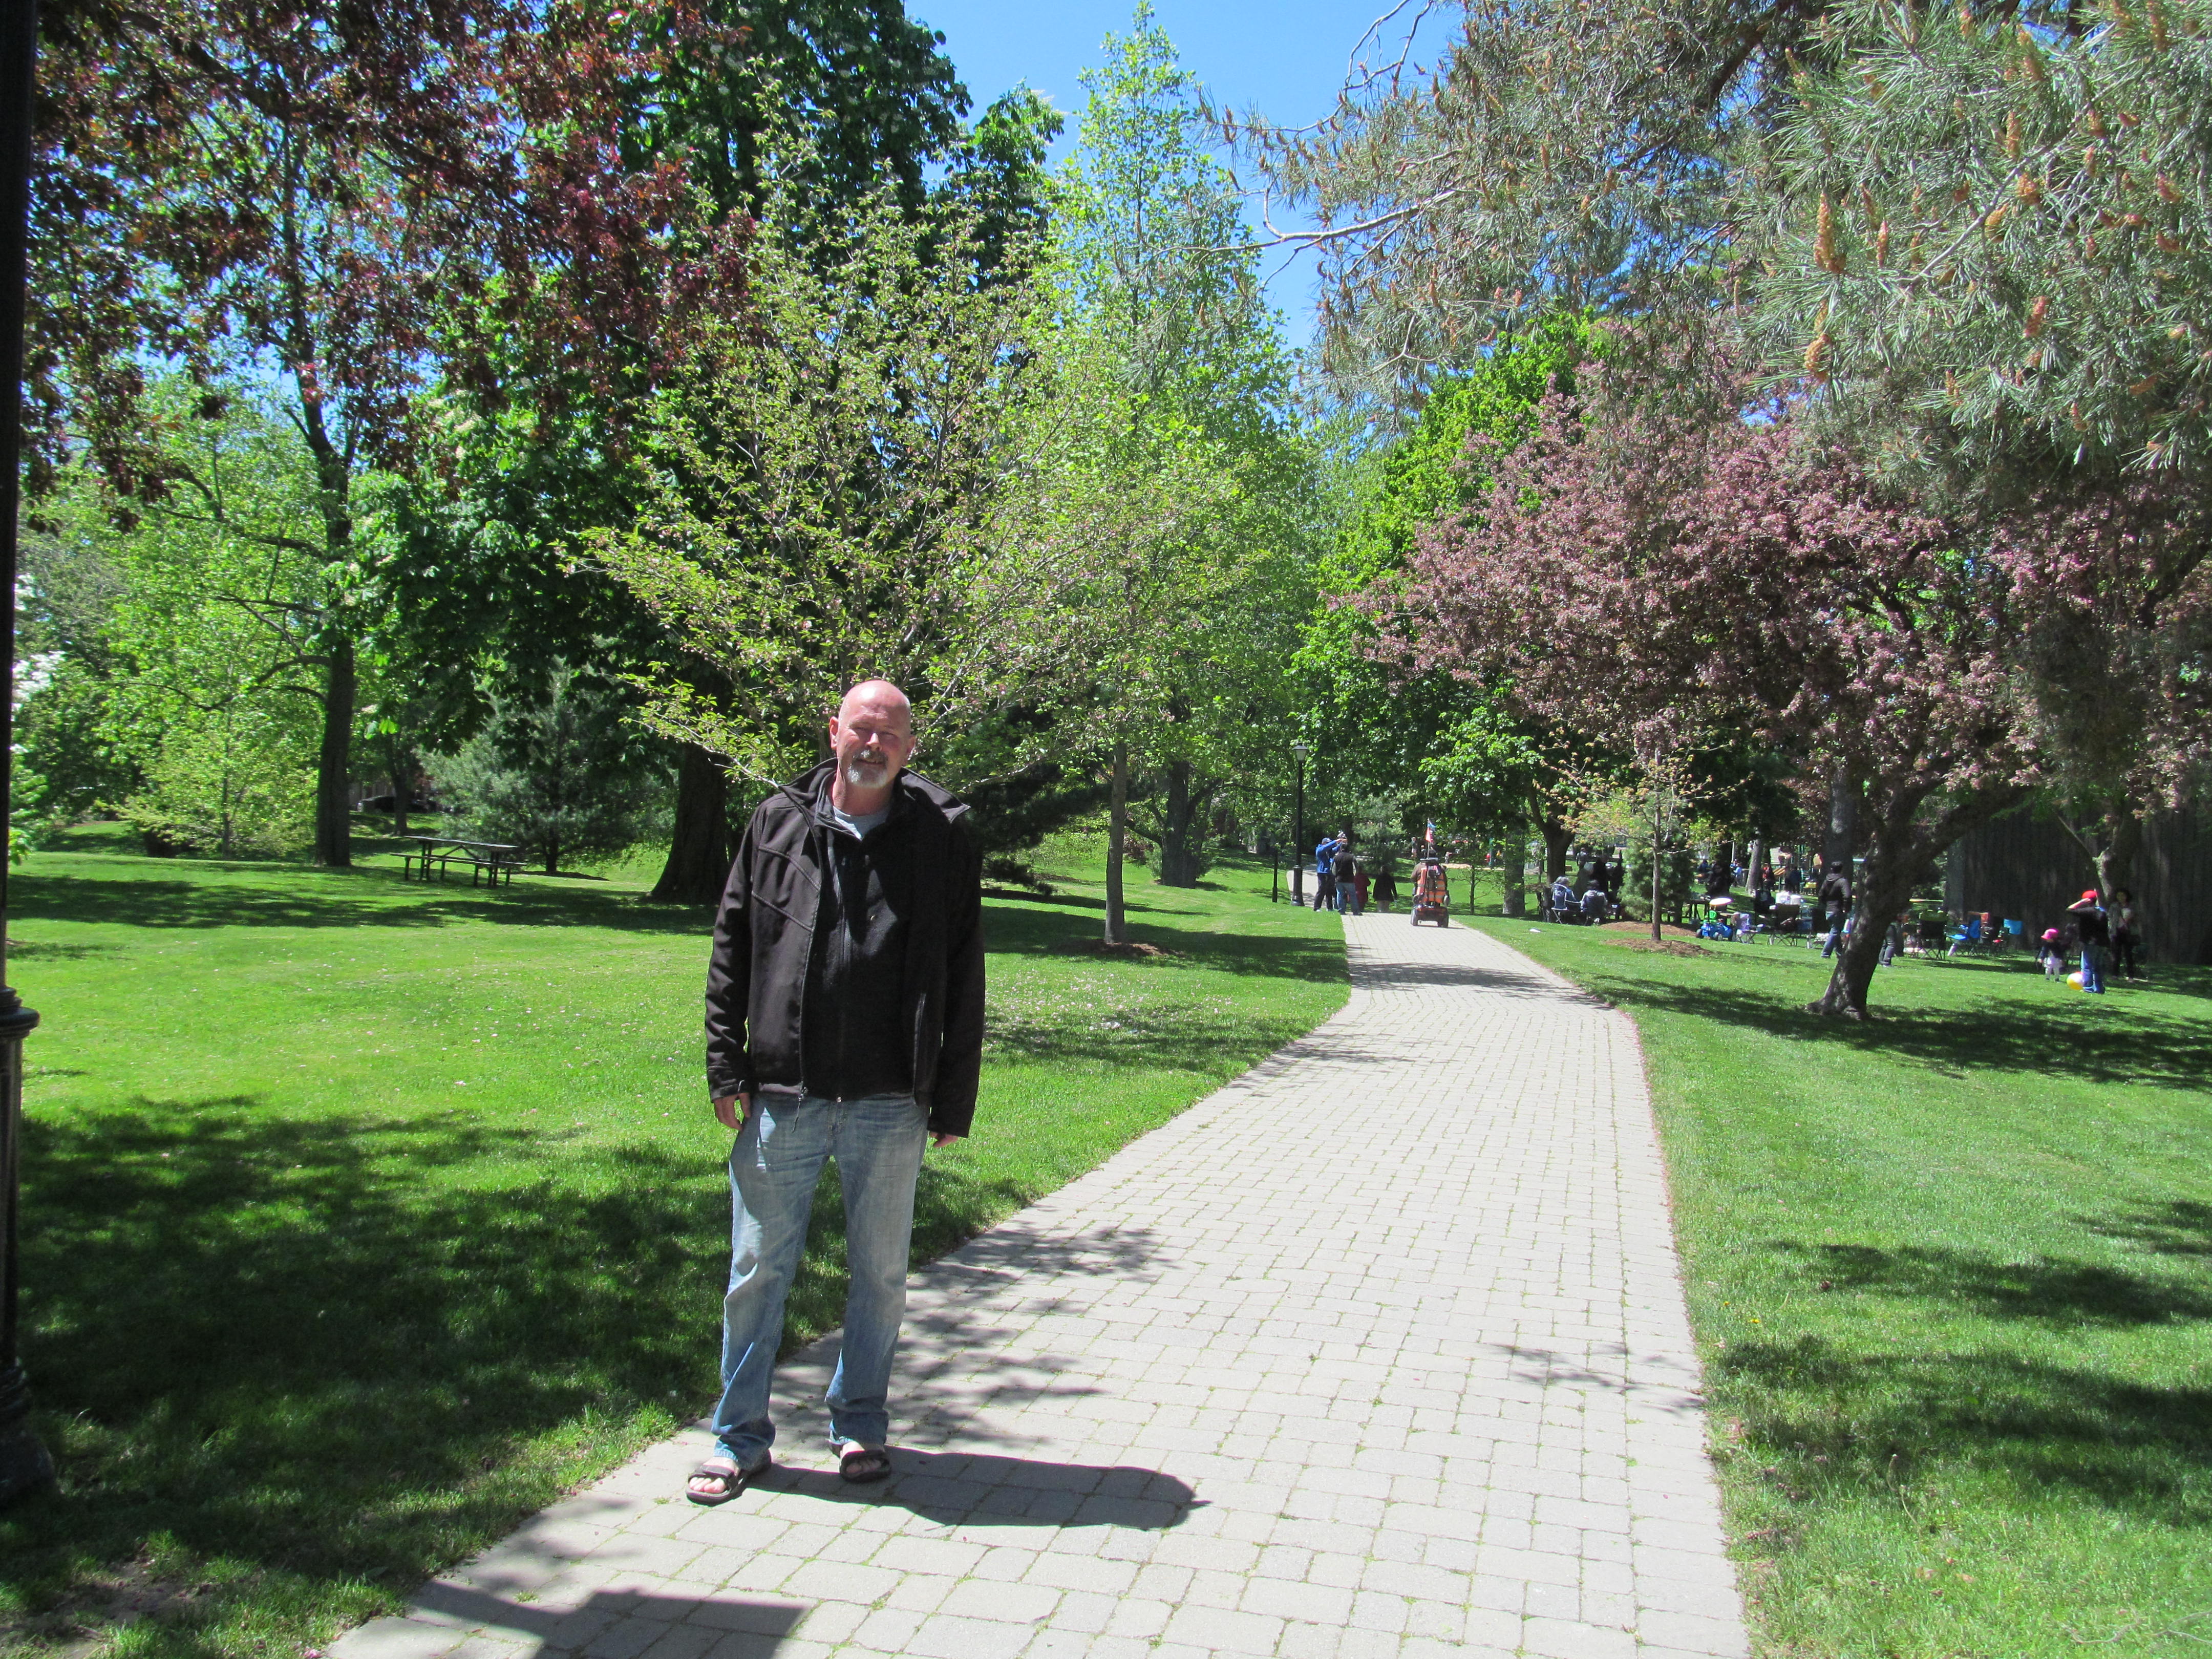
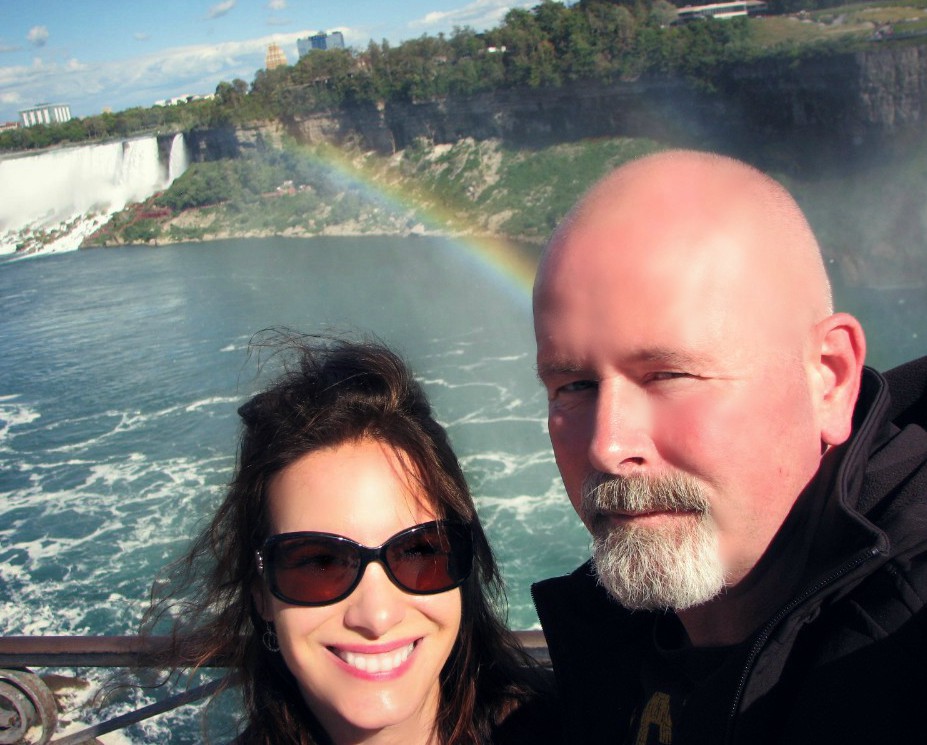
My new blog is almost ready! If you recall from my last post, I’ve decided to go back to a travel blog as I didn’t have much luck with the food blog thing. I’m travelling more than I am baking these days, so it’s the perfect time for a change. 

Getting back to travel writing is something I’ve been wanting to do for a while now, so I’m excited about this new change. I’ve written several travel stories, but I’ve hesitated to share them because this was supposed to be a food blog 😀 

Thanks so much for sticking around and following me in my blog adventures, everyone. I can’t wait to start sharing my road trip stories with you all again.

Now I’ve got some sad news to share…

You might recall in my last post I’d mentioned that Christmas had been kinda tough this year as I was really missing my parents. So I was extremely thankful for my friends and for my Aunt Colleen for including me in the holiday festivities. I got to spend Christmas Eve with Colleen and we also did a fun potluck dinner with my cousins at her retirement home as well. I don’t think I would have made it through the holidays in one piece without her.

On the same day that I shared that post (early March), my Aunt was rushed to the hospital and, sadly, she passed away a few days later.

I was absolutely devastated.

There are no words to describe how much the loss of my Aunt has affected me. I actually started to write this post over a month ago, just after her passing, but I had to step away from it because it was just too hard for me to write (or talk) about– with anyone. My coping mechanism at the time was to avoid thinking about her while I tried to process everything, especially since her passing was sudden and rather unexpected.

I know that talking about a loved one can help you cope with your grief, but I just wasn’t ready yet. I guess in my own warped mind I kept thinking she was coming back and it hadn’t fully sunk in that she’s really gone. Since Colleen was like a 2nd mom to me, I feel like I’ve lost another mom–and it was so close to my own mom’s passing as well. What a crappy year! I’m dealing with it as best as I can, but my Aunt’s death has really taken a toll on me–especially since I’d only just started to cope with the loss of my mom.

…

Read More »

Filed Under: family, friends, My Life, road trip, Writing

Blog Recap, Childhood Memories and Almost Spring!🌼☀️

March 3, 2019 by Pies & Prejudice 10 Comments

Hello Friends!

I hope you’ve been having a good winter so far, and if you’re lucky you got to sneak away somewhere warm and sunny. If you did, I think you may have forgotten to bring me? (Whoops!😂)

One thing is for sure–we’ve had WAY too much snow and it just keeps on coming. We’ve even broken a few records for snowfall amounts this winter (trust me, these are not the kinda records you want to break lol). Meanwhile, the cherry blossoms are coming up in BC!! (Bastards😁). I’ve been wanting to call my brother in Vancouver to catch up but I think I’ll wait ’til our deep freeze is over. I just can’t bear to hear about their t-shirt weather while I’m wearing long johns and four layers every time I step outside. Update: I took a risk and called him anyway and they’ve recently got snow. HA! I feel a little better now.

I am SO looking forward to Spring. Who’s with me? I’ve got a Spring Counter on my blog now (and by “now” I mean since last October), so you can count down along with me. 18 days, people! It can’t come soon enough.

I guess you’ve probably noticed a lot of crickets around here lately, hey? I figured it’s about time I shared an update as it has been a couple of months. As most of you know, last year was a pretty crappy one with the loss of my mom and some work/career changes as well. So, after the busy holiday season I finally had some time to kick back, relax, and re-evaluate where I was going and make some changes. One of them is this blog (again).

It was a little over a year ago that I decided to turn my blog into a food blog. I was baking way more than travelling at the time and I’d always wanted a food blog so it seemed like a good idea. But clearly (ie: crickets) it’s not going very well. Ya’ll know I love to bake but I just don’t spend enough time in the kitchen to keep coming up with new recipes. Most of my food blogging friends share several recipes each week whereas I’m lucky if I post one per month. I loved being part of the Recipe Round Up and a big thanks to my friend Kelly ‘Cereal Bar Queen Extraordinaire’ who graciously invited me to join the fun. It encouraged me to share more recipes but I still struggled to keep up.

It also doesn’t help that most people don’t like to bake pie. Pastry can be really finicky and it usually takes a lot of practice before it doesn’t drive you crazy. I’ve been baking pie for years and it still drives me crazy (ha ha). As a result not a lot of people have been trying my recipes– which is the main purpose of having a food blog, really #majorblogfail.

As you can probably tell by my geeky pies, I enjoy designing pies more than anything. But for some reason no one else wants to go to the trouble of putting Darth Vader, Superman or Doc Brown on their pies!!? What is wrong with you people? 😜

….Wait a minute, Doc… Are you telling me you built a time machine…out of a PIE??

So you’ll see a few changes to this blog as I’ll be posting more lifestyle-related content such as travel, local stuff, fun stories (quite a few people have recently told me really they enjoy my stories–who knew?), fitness & sports (I just joined a tennis/squash club at my local gym!) and, of course, loads of nostalgia. Especially anything 80s-related (with or without a geeky pie).

Now that I’ve officially declared this not a (designated) food blog anymore, I can go back to random ramblings and road trip stories now, right? (please say yes). It’s funny because I’ve been wanting to share some of my recent travels but I’ve hesitated because this is supposed to be a food blog haha. Thanks for (hopefully) sticking around, guys. I hope all my foodie friends will still visit, too. Because you know that you can ALWAYS count on me to bring you back in time with my nostalgic pies. No DeLorean required.

Ok, it’s time for my winter recap. I really don’t want to say ‘Holiday’ because that was so long ago now. But since I started writing this post at the end of January (let’s blame my friend Al for going away to NZ for most of February which made me extra busy, shall we? haha) I technically made the cut. You might recall how I feel about Christmas talk (or holiday movies) once January is over. But no more holiday talk after this post, I promise!

You’d better go grab a coffee as you may be here awhile 😁Because you have nothing better to do with your Saturday or Sunday than read my ramblings, right? (here’s where you lie and say “no, no, of course not” haha).

…

Read More »

Filed Under: family, Food, friends, Geeky Pies, My Life, Writing Tagged With: family, Food, holidays, Pie

Back to the 80’s. Hello Strawberry Shortcake PIE

June 16, 2018 by Pies & Prejudice 9 Comments

Hi friends! Summer is almost here and it’s finally strawberry (and rhubarb) season. Hurray!!

Let’s celebrate with a Strawberry pie, shall we? Even better if we can add a touch of
nostalgia by going back to the good ol’ 80s. Chock full of fresh strawberries and rhubarb, this is the perfect summer pie. It’s totally delicious… to the max!

(Recipe at bottom of post— strawberry shortcake doll is optional 🙂

So, who else had one of these dolls growing up?

If you’re like me, you not only had Strawberry Shortcake but all of her friends as well. Remember Lemon Meringue Pie? Blueberry Muffin? Or, what about Huckleberry Pie? I had all of their wonderful scents waffling into my nostrils on a regular basis. My mom used to say that my room smelled like a fruit salad. It’s no wonder I’m a pie baker now (ha ha).

Did you know that Strawberry Shortcake was created for greeting cards in the late 70s? She was created by artist Muriel Fahrion when she worked at ‘American Greetings’ card company. The original Strawberry Shortcake doll was designed by her sister, Susan and back then she was a simple rag doll with big freckles, red curls (made out of yarn) and a matching strawberry-printed bonnet and dress. In 1979, toy manufacturer Kenner Products licensed the character and created the first official toy doll.

In 1980, Strawberry Shortcake was all the rage and anyone who was anyone back then had one of these dolls and all her delicious-smelling friends. They also came with a little pet and ‘Custard’ was Strawberry Shortcake’s kitty. If you’re feeling nostalgic go google “modern Strawberry Shortcake doll’….I’ll wait ( I can’t share the photos here as some bloggers have been sued for sharing photos even with a link and sources).

She sure has changed a lot from 1982, hey? I can’t say I’m overly surprised though, as that was a long time ago. I’ve also heard that the modern Strawberry Shortcake comes with a cell phone now… instead of a cat. Crazy!

After the Strawberry Shortcake rolled out onto the shelves in the early 80s, an animated TV show soon followed suit— mostly to push the toys. Anyone else remember  the show? I used to watch it quite often, at least whenever the Smurfs weren’t on.

A remake of the show came out in 2003 but because I was in college then (and way too old for shows about dolls, no less), I never watched it and have no idea whether it was any good….or how it compared to the original show.

In the first show, Strawberry shortcake’s home was a ginormous shortcake surrounded by strawberry vines. Not long after she moved out of the shortcake and into a fancy mansion (not bad for an 8-year old, holy cow!).

And if you loved Strawberry-Shortcake, you can’t forget about the town’s ‘villian’: Purple Pie Man. He was always devising half-baked (pun intended) plans & get-rich schemes to take over Strawberry Shortcake, her friends and their village. Most importantly, though, he wanted to steal all the fruit (gasp!). He might have been the bad guy, but boy did he ever smell amazing. Yum.

Despite his name, Pie Man wasn’t a great baker at all. But he did have a magic pie plate which enabled him to spy on the Strawberry Shortcake village.  Man, I gotta get me one of those. Uh…er, for baking… Yeeeaahhhh, that’s it!  🙂

Okay, this was fun to walk down memory lane (you guys are still with me, right?) but let’s get down to the REAL strawberries. And rhubarb. With this amazingly delicious pie. Who’s with me?

Happy Strawberry season, lovelies! Please let me know if you do try this pie.
Love,
Dana xo

Print

Strawberry Rhubarb Pie

A delicious summery pie chock full of fresh strawberries and rhubarb in an all-butter crust.

Ingredients

Ingredients

  • 1 recipe pie dough half for the bottom crust and the half for a lattice top or pastry designs (I make flowers)

Filling

  • 4 cups fresh or frozen strawberries if using frozen, do not thaw
  • 2 cups chopped rhubarb
  • 1/2 cup brown sugar
  • 1/3 sugar
  • 1 tablespoon lemon juice
  • 2 teaspoons cinnamon
  • 1/2 tsp sea salt
  • 1/4 cup tapioca starch can use cornstarch instead
  • 3 tablespoons salted butter cut into small pieces
  • 1/2 tablespoon vanilla bean extract or reg vanilla
  • 1 teaspoon orange extract* optional but highly recommended
  • 1 cup fresh not frozen halved strawberries for the top*--not necessary but it adds a nice freshness to the pie

Instructions

Instructions

  1. Preheat Oven to 350F
  2. Roll dough onto a floured surface and fit into a pie plate, saving the rest of the dough for a lattice top or cutting out designs for the top. Place in freezer while putting together the filling. If using a store bought bottom crust, keep in freezer while preparing the filling.
  3. In large bowl place rhubarb, sugars, cinnamon, salt and tapioca starch. Allow to sit for 1/2 hour and then drain juices.
  4. Add fresh or frozen strawberries, lemon juice, vanilla and orange extract (if using) and mix. Dot with small pieces of butter and lightly combine.
  5. Pour/ladle filling into the (unbaked) pie crust, careful not to overfill. Add a lattice top or pastry designs
  6. Bake for about an hour, or until the crust is browned and the filling is bubbling. If the top & sides start to get too browned during baking, cover with foil or a pie shield.
  7. Allow pie to cool completely, preferably overnight, before slicing. Strawberry pie needs more time to thicken as it can be very liquid-y when it comes out of the oven.


Filed Under: 80s, family, Food, friends, geek, Geeky Pies, Writing

Movie-themed Pies & That Time I Was on the Set of a Christmas Movie

February 28, 2018 by Pies & Prejudice 2 Comments

*sorry about the multiple posts & notifications today, I’m having some technical issues with wordpress…seems to be fixed :D*

Hi Guys!

I hope you had a lovely Valentine’s Day. How are we almost at the end of February already? Spring is less than a month away now and the start of Daylight Saving (my favourite day of the year!) is less than 2 weeks away. Yes! I am beyond excited.

Since spring is just around the corner, I figured I’d better share my holiday pies ASAP. Usually the cut off for anything-Christmas (for me, anyway) is early January. So this is probably already too late but a few folks have been asking about my holiday pies so I figured I’d better catch you all up. If you can believe it, several of my closest friends aren’t on social media (Facebook, instagram etc!??) so they have been clearly missing out. Just pretend it’s still January when you’re looking at my Christmas pies, OK?

We had a pretty cold start to winter and at one point in early January it was colder in Ottawa than the North Pole… AND Mars! (Seriously). Thankfully though, the rest of winter has been quite mild and we haven’t had much snow, either. We even got to 10 degrees recently– which is pretty sweet considering we’re usually at -20 in mid February. Not too shabby at all.

But I’d still rather be Arizona if I could choose…Just sayin’. My friend Kelsie, who lives in the sunny state, is keeping her eye out for any houses-for-sale on her street for me (just kidding–I wish!). That way I can be a taste-tester for all her wonderful creations. She is the Queen of amazing dessert combos (check out her blog, I seriously drool at every dessert she comes up with). I’m making her Irish Cream/Coffee brownies for St Patrick’s Day, I can’t wait. They look incredible! I’m pretty sure she’ll make the best neighbour EVER (hee hee!).

I love Christmas but as soon as the holidays are over, I don’t want to see anything Christmas-related until next November. You cannot make me watch Elf with you in April and Hallmark doesn’t tempt me with their “Christmas in July” series at all (yep, it’s a thing). Not gonna happen. It’s bad enough some people blog about the holidays in late February (hehe). But really… who in their right mind wants to see Christmas decorations (or snow for that matter) in the middle of July? It’s just plain wrong.

Which leads to my next story….

A few years ago I was in Vancouver driving down a scenic highway enjoying a beautiful, warm summer day (in early July) when suddenly I came across snow. LOADS of it–we’re not talking about the little pile you see at the back of a hockey rink during the summer. And this was nowhere near the mountains on the north shore of Vancouver, either (which can get some snow in the summer). This was near White Rock–close to the the BC/Washington border. This area doesn’t get that much snow even in the winter (well, they get a wee bit but it doesn’t stay long).

It looked like summer everywhere else— except for this particular street. Weird. And the houses and trees were completely covered in the white stuff. Was I hallucinating? Or was I having some sort of strange delusion?

I know some folks leave their Christmas lights up all year-long, but this was way too many lights for the summer. It looked more like a Christmas village.

Judging by the quizzical look on my friend Jorge’s face, he was seeing this too. Perhaps we’ve entered the Twilight Zone? Or mayyyyvbe we were in an X Files episode? The show was filmed in Vancouver, after all (I was a huge fan of the show and did an X-Files tour the first time I was in Vancouver! #nerdalert). But the show ended a few years earlier so this probably didn’t have much to do with the FBI or aliens.

“I’m not saying this might be aliens but….it’s aliens.” I chuckled, channeling Mulder.

It turns out we weren’t too far off. We later found out that this was a film set, but there was no Mulder or Scully to be found anywhere (unfortunately).

Intrigued (and nosy as all heck), we pulled over to the side of the road so that we could fully investigate this odd phenomenon. And we weren’t the only curious folks, either. There were several cars parked along the side of the highway and many other people walking around checking out this strange sight.

My nosy-ness came in handy. As we started walking closer to the main house, a couple of friendly guys walked over and started chatting with us. They were part of a film crew (location scouts) and we were actually standing on a movie set. Yep, they were filming a Christmas movie! Now this was exciting.

I looked pretty chilly standing beside the (fake) snow in my summer outfit, don’t I? Brrr.. Don’t worry, it looked cold but it was actually 25 degrees (which is actually fairly warm for Vancouver).

Do you guys remember a holiday movie that came out a few years ago with Danny De Vito and Mathew Broderick? It’s called ‘Deck the Halls’ (2006) and it’s about two neighbours fighting over who has the best Christmas decorations. One of them (De Vito’s character) had decorations that were ‘so bright it could be seen from outer space!!’

Yep, we were on the set of THAT movie. WOOO! …

Read More »

Filed Under: 80s, Food, Geeky Pies, road trip, Road Trips, Up North, Writing

Carrot Pie with Maple & Cardamon: A Pie that’s Good for your Eyes!

February 7, 2018 by Pies & Prejudice 6 Comments

If you love Pumpkin Pie and its close cousin: the ‘Sweet Potato’ Pie, I think you’ll loooove this yummy Carrot Pie. It’s creamy and lightly-spiced with a touch of cardamon, maple syrup and brown butter. Plus it’s healthy since it’s made with carrots. Which means you can have a couple pieces guilt-free–since your eyesight depends on it and all!

Most people love carrot cake. It’s one of the most popular desserts on any restaurant menu for good reason. But if you ask anyone if they want to try a Carrot Pie, they’ll probably look at you like you have 3 heads. It’s okay for a cake to be made with carrots, so why not a pie? Right?

This Carrot Pie is a bit sweeter than a pumpkin pie, but the key is roasting the carrots for the best flavour. Then you add some spices (cinnamon, cardamon and nutmeg), maple syrup, cream and brown butter–which takes it to the next level (doesn’t brown butter take everything to the next level?). Before serving, I topped each slice with some coconut whip and a light sprinkling of cinnamon & cardamon.

It’s so similar to pumpkin pie that you might be hard-pressed to tell the difference. Some of my friends (aka guinea pigs) didn’t even know it wasn’t pumpkin pie since it looks just like it and has a similar taste. But they knew it was somehow slightly different than their ‘usual’ pumpkin pie.

I first made a Carrot Pie last year when my Aunt Colleen and I were chatting about pies and she told me about all the unique pies she used to eat all the time when she was young (she’s in her 80s!) such as raisin pie, butterscotch pie and carrot pie. Since I’d never even heard of a carrot pie (my dad, who was her brother–loved butterscotch pie), I couldn’t wait to give it a try. Shortly after our pie conversation, I was in a used Bookstore and came across an old cookbook which included a recipe for a carrot pie. I mostly followed the recipe (with a few minor changes) and then brought the pie over to her place so we could share a couple of slices along with a cup of tea.


We really enjoyed it, and we both thought it tasted very similar to pumpkin pie (maybe a wee bit sweeter), but I definitely still preferred the pumpkin.

Just recently, however, I decided to try another Carrot Pie but with a few more additions to the recipes that I’d found in the book and also online (there aren’t too many and they are all fairly similar). It turned out fabulously! Instead of boiling the carrots and mashing them like most of the recipes called for, I decided to roast them. I also added maple syrup, cinnamon and brown butter, and a couple teaspoons of cardamon. In addition to the carrot puree, I added a small scoop of pumpkin to give the filling a bit more texture. But if you don’t have any pureed fresh pumpkin, or can of pumpkin handy,  you can just leave it out. I had some leftover from my pumpkin dog treats and had just wanted to use it up. I was definitely more impressed with this version of a Carrot Pie. So yummy!

I’m sharing this carrot pie recipe today for the #24carrotgoals party– a Carrot Collaboration on Instagram that I’m a part of along with several other fabulous food bloggers & Instagrammers. If you’ve got a few bags of carrots sitting in the fridge and you’re looking to make a few new delicious appetizers, meals, or desserts with carrots (there’s a couple great carrot cake recipes to try—but only after you make my carrot pie, of course! haha) you need to check these out. See the end of this post (below recipe) for the links to my fellow bloggers’ awesome carrot recipes, or search the hashtag #24carrotgoals on IG (or on one of the two links below) for dozens of fabulous carrot recipes. A huge thank you to Rebecca & Ruth of Square Meal Round Table & Annie of What Annie’s Eating for organizing this collaboration and also for including me :D. I can’t wait to check out all the awesome recipes!

I hope you guys get a chance to make this Carrot Pie and please let me know what you think if you do make it. Don’t eat it all at once though, or you may end up with Superman’s X-Ray Vision haha (See! you just knew I had to geek up this post somehow hehe).

Have a wonderful week, everyone!

Dana xo

Print

Carrot Pie with Maple & Cardamon

A delicious spiced cream pie made with freshly roasted carrots, maple syrup and cardamon

Ingredients

Ingredients

  • 1 partially baked blind-baked Pie shell (homemade or storebought)
  • Carrot Filling
  • 2 cups roasted & pureed carrots roasting isn't necessary but it adds lots of flavour
  • 1/3--1/2 cup fresh or canned pumpkin--(not pie filling_
  • 2 teaspoons cinnamon
  • 1/2 teaspoon fresh nutmeg
  • 1 to 2 teaspoons cardamon depending on how much you like this spice
  • 3/4 cup brown sugar (or coconut sugar)
  • 1/3 cup maple syrup
  • 1 tablespoon cornstarch
  • 2 egg yolks plus 1 egg
  • 3 Tablespoons brown butter or regular butter
  • 1/2 cup full-fat cream or coconut cream
  • 1 cup milk reg, almond, cashew, coconut
  • 1 teaspoons vanilla bean extract
  • pinch of sea salt and black pepper

Instructions

Instructions

  1. Roll out your favourite pie dough and put into a 9" pie plate, or skip if using a store-bought pie crust. If you're making your own crust, after rolling out and placing in pie plate, place in freezer for at least half an hour before baking to reduce likelihood of shrinking. Then blind-bake the crust (without filling, and using pie weights) for about 20-30 minutes at 300F. This will help prevent a soggy bottom. Allow crust to cool completely before filling.

  2. For the best flavour, roast carrots (I use about 8-10 medium large carrots) for the puree. Let cool slightly and then add the carrots to a large saucepan, along with pumpkin (if using), brown sugar, maple syrup, butter, spices and salt & pepper. Mix well and cook for a few minutes over medium heat just to combine.

  3. Add the mix to a blender and mix until fairly smooth. Then add cream, milk, and eggs. At this point, blend very briefly at the lowest speed just to combine the filling. You don't want to over-mix once you add the eggs and cream. Then add cornstarch and give it another quick whirl.
  4. Once the crust is cool, scoop the filling into the crust and place in the oven at 375F for about 10 minutes. Reduce heat to 350F and bake for another 40-50 minutes--or just until the middle is just slightly jiggly. It will cook for a bit longer after it's out of the oven. Cool at room temperature for an hour and then cover and refrigerate....preferably overnight--- but at least for a few hours. Enjoy with some whip cream or coconut whip!

Check out some of these other delicious carrot recipes from my fellow bloggers:

Square Meal Round Table’s Rainbow Carrot and Ricotta Tart

The Cooking of Joy’s Candied Carrot Rose Tart

Better with Biscuits’ Carrot Souffle

This Healthy Table’s Beet and Carrot Galette

Always Eat Dessert’s Carrot Cake Squares with Orange Glaze

Figs & Flour’s Thai Peanut Pizza

Fufu’s Kitchen’s Oven Baked Carrot Fries Drizzled with a Tahini Sauce

Flours in Your Hair’s Carrot Pecan Cookies

Hola Jalapeño’s Roasted Carrots with Chipotle-Honey Butter

Worth Pause’s Paleo Thai Curry Carrot Soup

Something New for Dinner’s Minted Sous Vide Carrots with Balsamic Vinegar and Goat Cheese

What Great Grandma Ate’s Paleo Carrot Mug Cake

More Icing Than Cake’s Spiced Quinoa & Roasted Carrot Salad

Hot Dishing It Out’s Vegan Carrot Whoopie Pies

Confetti Kitchen’s Harissa-Roasted Carrots with Lentils and Yogurt

Easy and Delish’s Carrot Spaghetti

Pie Girl Bakes’ Five Spice Carrot Bundt Cakes with Bourbon Cream Cheese Glaze

Smoothies and Sundaes’ Carrot Cake Sourdough

Zestful Kitchen’s Moroccan Stuffed Portobello Mushrooms

Food by Mars’ Paleo Carrot Walnut Loaf Cake

Cosette’s Kitchen’s Sumac Carrot and Feta Salad

Measuring Cups Optionals’ Carrot Curry Soup

Rezel Kealoha’s Turkish Yogurt Carrot Dip

Pies and Prejudice’s Carrot Pie with Maple & Cardamom

Amanda Skrip’s Rainbow Roasted Carrots with Citrus Fennel + Arugula

Baking The Goods’ Roasted Carrot & Herby Feta Galette

Marianne Cooks’ Carrot and Zucchini Mini Muffins with a Cinnamon Frosting

Rumbly in My Tumbly’s Chai Carrot Pie

Cook Til Delicious’ Mini Carrot Cake

What Annie’s Eating’s Roasted Carrots with Herby Carrot Top Salsa Verde

It’s a Veg World After All’s Zesty Sunflower Carrot Spirals


Filed Under: family, Food, Food Network, Geeky Pies, Writing

Summer, Cherry Pie Cupcakes and 80s Flashback

August 27, 2017 by Pies & Prejudice 8 Comments

Hi guys, I hope you’re having a fabulous summer 🌞

How the heck are we almost at the end of August already? Seriously. It feels like it was only a few weeks ago that we ‘celebrated’ Summer Solstice. Yes those quotes are intentional because while the solstice marks the official start of summer and it’s the longest day of the year, it also means the days start getting shorter again. Wahhh! (I take my sunshine seriously, ya’ll).

We’re having the best summer ever here in Ottawa, though most of my local pals probably won’t agree (and might have even re-read that sentence to make sure they read it correctly haha). Sure, we’ve definitely had way too much rain but we haven’t had that much humidity this summer, thankfully. While I love me some summer heat (the hotter, the better), I just can’t stand the humidity. So this summer has been chock full of mostly hot days and cool nights, which is perfect to me. And my hair is very appreciative of the lack of humidity as well. Just sayin’. #frizzyhairproblems #the80scalledtheywanttheirhairback.

Who here likes cherry pie? I know, silliest question ever.

There’s something about a slice of fresh, homemade cherry pie that screams summer to me. But since you’ve probably already had lots of cherry pie already this summer (at least I hope you have), I thought I’d change it up and take cherry pie to a whole new level.

Behold: The Cherry Pie Cupcake. Heck yes!


(Recipe below this post)

A vanilla cupcake is slathered with a fresh cherry buttercream and then drizzled with cherry pie filling. It’s basically a combination of a cupcake and a slice of pie in one easy hand-held treat. How awesome is that? And, these cupcakes are actually quick & easy to make if you’ve already got some cherry pie filling leftover from your recent pie bake-a-thon.
What? You usually don’t bake one pie, let alone a bunch of them? Now who’s crazy? 🙂

Speaking of pie…this past July marked my very first PIE Anniversary! Yep, it was last year on Canada Day while making a Strawberry Balsamic pie for the festivities that I decided to forgo the usual lattice crust and do something a little different. I took advantage of the fact that the berry filling was red and created a Canadian flag out of the top pastry. It worked out deliciously well! Turns out there’s a whole other world beyond a lattice crust. Who knew? I was immediately hooked on pie design.

It didn’t take me long to start with the geeky pies, not too surprisingly (for those who know me, anyway). I made a Star Wars-themed pie for a friend’s birthday shortly after this one, and have made many a Superheroes/Star Trek/Star Wars pies in the past year. I’ve developed a Geeky Pie addiction, and not seeking any treatment for it whatsoever 🙂

This is one of my favourites: A Wonder Woman pie for the new movie– which came out this past Spring. It was my first time ‘drawing’ on pie crust and I had a lot of fun with it. Considering I hated art class in high school and I was pretty bad at it (worst marks, by far), my drawing isn’t all that terrible—surprisingly.

So, this year for Canada Day I made a fun pie to share with friends for our country’s 150th Birthday celebration.

Can you really get any more Canadian than a pie with a moose and a beaver in a canoe with a Timmies coffee? Probably not…


I also made a 4th of July pie for our lovely neighbours to the south. It’s a no-bake pie with fresh strawberries and blueberries and then I decorated it with pastry stars and whipped cream. It was deliciously American!

I also tried my hand at a braided pie crust. I’d been admiring all my lovely pie friends’ fantastic braided pies recently and just love the pretty effect. The braids especially stand out with a triple berry filling.


You guys might laugh at me but while I was standing in front of my pie with pastry strips all ready to braid, I drew a complete blank. Somehow I’d completely forgotten how to braid!! Crazy, right? As a kid I could braid with my eyes closed and probably in my sleep, too. My friends and I would braid each others’ hair all the time. I think it is (or was?) a rite of passage and a very popular pastime for a teenage girl. Mind you, I haven’t braided anyone’s hair (including my own) since 1989, so I guess it has been awhile. 

So I felt a bit silly entering ‘how to braid’ on the google machine but as soon as I watched the first 2 seconds of a Youtube video it all came back to me and I was braiding my pastry strips like a pro.

And then suddenly a huge wave of nostalgia swept over me and I was immediately transported to the summer of 1988 where I spent every. single. day at the pool hanging out with my friends. We’d sunbathe, swim, talk about boys, bugged the lifeguards (especially the ones we liked), AND braided each others’ hair. All whilst listening to the ballads of Corey Hart (swoon!) blaring from the radio. Ah, the good ole’ days. I miss the 80s…

Since I’m going down memory lane, and had also recently come across a few old photos, I thought I’d share a couple just for fun. Because who doesn’t like cheesy 80’s photos anyway, right?

This is my good friend Andrea and I sitting poolside while chatting and working on our tans. She was one of the lifeguards that I’d befriended and we kept in contact long after she moved to BC. She inspired me to become a lifeguard (a few years later) but the summers here at the pool just weren’t the same without her.


Would you believe that we actually slathered ourselves with BABY Oil in order to get the best tan ever? And sometimes (man, I can’t believe I’m actually admitting this), we even used Crisco Oil! I know….craZy! Thinking back, I can’t believe we actually thought that was a good idea (especially in this day and age with our sunscreen obsession) . But our tans were fabulous and we often smelled like french fries–which is never really a bad thing, right?

Don’t forget to also admire my “highlighted” hair. Anyone remember ‘Sun-in’? I know, orange is SO not my colour but it was all the rage back then. Oh and before we move on (to slightly embarrassing photo #2), don’t forget to check out my snazzy t-shirt I was wearing as well.

Yep, it’s Corey Hart! I got that shirt at his concert when he was here in Ottawa in the late 80s. It was my very first concert and I couldn’t talk for a few days afterward because of all the screaming we did. If you ever hear his version of ‘Rudolph the Red-Nosed Reindeer’ around the holidays, you may notice that it’s live. He recorded that song here in Ottawa, even though it was July. We were very confused when he started singing a Christmas song, but we still screamed for the entire duration of the song and if you listen closely, you might recognize my voice. Okay, maybe not… but I still enjoy hearing that song and remembering: ‘Wow, I was one of those crazy gals screaming at Corey while he’s singing Christmas songs in the middle of the freaking summer’ haha.

Here’s a photo of my girlfriends and I hanging out in the pool office. We were pretty fortunate the lifeguards liked us enough to let us in their private ‘office’. It seemed a lot more exciting at the time…


Oh and before you ask, that’s me on the far left with the football shirt and (almost) mullet. HA!  This was the very start of my tomboy phase. I hope you’re not laughing too hard. I thought I was cool at the time and I wore that shirt over my swim suit almost every day (when I wasn’t wearing my Corey Hart shirt, that is).

At this point you might be wondering…why did I even both to change my blog if the name is different but I’m still only sharing travel stuff and 80s pics? Well, my friends, I thought I’d ease you guys into the whole food blog thing before I start sharing a lot more of my recipes. I’m pretty sure you’ll come back again in hopes to see more cheey 80s photos though, right? hehe

Okay, here is the recipe for my Cherry Pie Cupcakes. Hope you guys enjoy them, and the rest of summer, too! I’ll be back with another recipe shortly. Pinky promise.

Dana xo


5 from 1 vote
Print

Cherry Pie Cupcakes

A cupcake and a pie in one! The perfect summer treat

Ingredients

For the Vanilla Cupcakes

  • 1 ½ cups Gluten-Free flour Packaged or your own mix
  • ¾ cup sugar
  • 1 ½ teaspoons baking powder
  • 1 teaspoon xanthan gum omit if it's in your flour mix
  • ½ teaspoon salt
  • ½ cup butter room temp
  • 2 large eggs room temp
  • ½ cup milk any--cow, almond, cashew, coconut etc.
  • 1 Tablespoon vanilla bean extract or reg vanilla

For the Cherry Pie Buttercream

  • 1 cup butter room temp
  • 2 cups powdered sugar or use more if you like your frosting sweet
  • 1 tablespoon or more whipping cream, coconut cream or milk
  • 1/2 tablespoon vanilla bean extract or regular vanilla
  • 1/3 cup Cherry Pie Filling- homemade or store-bought my simple recipe below

For the Cherry Pie Filling (if not using pre-made or store-bought filling)

  • 1 cup sweet or sour cherries if using frozen don't thaw first
  • 3 Tablespoons granulate sugar you can use brown or coconut sugar if preferred
  • 1 Tablespoon maple syrup or omit and add an extra tablespoon of your preferred sugar
  • 1 tsp cinnamon
  • 1 tablespoon tapioca starch
  • pinch sea salt
  • 1 teaspoon vanilla bean extract or regular vanilla

Instructions

  1. For the Cherry Pie Filling (if not using a pre-made or store bought pie filling):

    In large saucepan whisk together sugar, maple syrup (if using), cinnamon, sea salt, and tapioca. Add cherries (pitted first, if using fresh cherries) and mix into the sugar mixture. Cook over medium heat, stirring often. I often use a potato masher to break down the cherries while the sauce is cooking. When it begins to boil, cook for another minute or two until thickened. Remove from heat and add in vanilla. Use immediately or store in the fridge until ready to use for the buttercream and topping for the cupcakes.

For the Vanilla Cupcakes:

  1. Preheat oven to 350F. Line a cupcake pan with cupcake liners.
  2. In medium bowl add flour mix and whisk well (I always whisk gluten-free flour really well first), then add sugar, baking powder and salt.
  3. Add butter to the flour/sugar mixture and, with a hand mixer, beat on low-speed until thoroughly mixed. It will be crumb-like in texture, similar to coarse sand. Add in the eggs, one at a time, and mix until blended.
  4. Pour in the vanilla and then slowly add milk. Beat on medium for about a minute or so, until batter is fairly smooth (since GF flours don't contain gluten, you don't have to worry too much about over-mixing). If batter's too thick, gradually add an extra couple of teaspoons milk (you probably won't have to add extra milk if you're using reg vanilla extract). Batter should resemble a soft frosting when it comes together.
  5. Fill liners with batter to almost ¾ full. Bake for about 17-20 minutes--but I usually check them in about 15 minutes. When they're slightly golden and a toothpick inserted comes out clean, they're done. Allow them to cool completely.
  6. Frost with cherry buttercream (below) or your favourite frosting.

For the Frosting:

  1. Using a mixer, beat the butter on high for a minute or two.
  2. Turn speed to low and add confectioners sugar--but only a half cup at a time to gradually incorporate the sugar into the butter. Add salt.
  3. Slowly mix in vanilla extract and cream (or milk) and cherry pie filling and continue to beat on medium-high for a minute or two. After it comes together, increase speed to high and continue to beat for several more minutes (aim for 5 or more minutes, for best results).
  4. Frost cupcakes and drizzle each with reserved cherry pie filling.


Filed Under: 80s, family, Food, Geeky Pies, Ontario Road Trip, Road Trips, Writing

Spring Road Trip and Maple Blueberry Pie

June 13, 2017 by Pies & Prejudice 10 Comments

Hey guys, how is your spring going so far?

Spring is my (only) favourite season so I reallllly don’t want it zipping along so fast thankyouverymuch. If it were up to me, I’d be more than okay with spring all year-long. Just sayin’…

So in attempt to extend spring, I made this Maple Blueberry Pie. Can’t hurt, right? We just wrapped up our Tulip Festival not too long ago so I thought it’d be fun to add a pretty tulip. You’re probably surprised to see that there is no Pac-Man or a Superhero on this pie, right? (I get that a lot).

(scroll to the recipe below if you don’t want to read my ramblings—WHAT?? That’s crazy talk).

Thank you ALL so much for coming to check out my new blog, all the positive feedback and your messages and comments on my blog and social media. It’s super fantastic. I’m very happy to finally share more recipes with you guys, too (don’t worry, my geek theme is optional). Been a long time coming…

So far it’s been a fabulous Spring so far and, as always, it’s been absolutely gorgeous here in my hometown (Ottawa). Our world-famous Tulip Festival just ended (if you missed my post last spring, read about our tulips here) and I managed to get a few nice pics of the tulips again this year. If you’re coming to Ottawa for a visit, I strongly recommend planning your trip in May. This is thee best time to see the tulips in full bloom, and it’s usually too early for the hot, sticky weather as well (huge bonus!).

One thing is for sure, you’ll love our gorgeous, colourful tulips. The gardens are sure a sight to behold…

This also happens to be my ‘office’ as I also work outdoors. Not too shabby at all, right? #selfemployment #perks

I’ve also done quite a bit of travelling this spring as well…2 road trips already, and it’s not even summer yet (crazy, right?).

In April my guy and I went to Vermont for Maple Fest (post coming soon), and then during the May long weekend we went to Niagara-on-the-lake for the holiday and to also celebrate my birthday. We had a fabulous trip!

Since we haven’t been on a proper road trip since last summer, I knew I couldn’t wait until the Fall to get outta dodge. Desperation really starts to kick in when it’s been almost a month year since I last roadtrip’d (ha ha).

While I don’t travel nearly as much as I used to (hence the new blog theme), my guy’s work closed down for a couple of months (for renovations) this spring so we decided to sneak away for a bit. He figured it was a good time to use his summer vacation while it’s quieter (he still did occasional private parties in the basement). By travelling during this time, he now won’t have to burn any time off during the busy summer season. So we probably won’t be going anywhere ’til early Fall, when we’ll likely head to the East Coast visit his folks.

There is no better place to kick off the first unofficial weekend of Summer (Victoria Day weekend in May) than Niagara-on-the-Lake! This was my 3rd time visiting and it was more stunning than ever. I’m not at all surprised that NOTL is considered ‘The Most Beautiful Town in Canada’.
As soon as you get here, you won’t want to leave…


The town is chock full of tulips, lilacs and every other flower under the sun at this time of year.

I’m a complete lilac addict. It’s actually bordering on a problem because as soon as I come across them, I’ve got my face stuck in the flowers to give them a good sniff. I probably look crazy(er), but I just can’t stop. There has gotta be a LA (Lilacs Anonymous) group for this, right? Probably only runs for the month of May though….haha

And, of course, this is wine country so you could spend all your time going from one vineyard to the other, and sipping a glass of wine on a garden patio in between tours.

Even if you don’t like wine, the scenery alone is worth the visit here


We did a few wine tours, a couple of brewery tours and ate LOADS of amazing food as well.


There are also loads of scenic areas for bike rides and nice walks.

I’ll be doing a full recap post on our Niagara adventure soon! If you haven’t been there yet, hopefully I can encourage you to check it out. Just a warning though….this place can be completely addicting (almost as much as chocolate…or lilacs)

We also did the boat trip under Niagara Falls, so you’re guaranteed to see some fun pics in my next post. Let’s just say I would have been LESS soaked if I’ve gone over the falls in the barrel like I was hoping to do (silly rules/by-law restrictions).

BTW, if anyone from the Niagara Falls Tourism Board is reading this, you guys really need to hire Superman to give free rides over the Falls. If that doesn’t boost tourist to the area, I don’t know what else will (um, not that you need any help really….the place has been packed anytime I’ve been there).
The movie Superman (the 2nd one, actually) is one of my favourite flicks, so I may be biased. Anyone else think of Lois and Clark while visiting the Falls?…. or am I just crazy? (um, maybe don’t answer that question).

Here’s a sneak peek into our fun at the Falls. This is right before Billy threw me over the railing (I only wish I were kidding :D).

So…. let’s get down to the most important thing about this post (well, besides Superman)… how about a PIE?

Oh look at that, I’ve combined pie AND superman. Whoops. How did that happen? It’s a bird…it’s a plane…no, it’s a….. BLUEBERRY PIE?


*The Superman logo is optional, but it will definitely win you points with your geek friends (like me! haha).

This is one of my new favourite pies. It’s a baked pie but with added fresh berries on top  after it’s cooled. Throwing on some fresh berries is a little easier if you’re not using a top crust, of course. I usually make fancy pastry shapes or words and place them on top afterward. If you decide to do a top lattice, just throw a few berries around the lattice strips.

I’ve also used a combo of other berries to make this pie. You can just use whatever you like or have on hand. Blueberry and cherries are a fabulous mix and a bit different from the usual combos–that’s what I used in the Superman pie (above). Like most pies, the berries are fairly versatile.
So… let’s get on with our pie baking fun, shall we?

(I’m working on my recipe format, please bear with me! thanks 🙂 

Print

Maple Blueberry Pie (baked & fresh)

A delicious baked blueberry (or a combo of berries) pie with fresh berries thrown on top for a more 'fresh' taste during off-season. So yummy and versatile, too.

Course Dessert
Prep Time 1 minute
Servings 6
Author Dana, Pies & Prejudice

Ingredients

CRUST

Pie Crust for a single 9" pie (*Double if you want a top crust, lattice or shapes)

  • 1 1/2 cups GF Flour (your own mix, Bob's GF flour, cup4cup etc)
  • 1 teaspoon sugar
  • 1/2 teaspoon salt
  • *pinch of cinnamon (optional but adds a really nice flavour)
  • 1/2 cup cold/frozen butter , grated
  • 1 tablespoon lemon juice or apple cider vinegar
  • 1 egg
  • 2-4 tablespoons very cold water or milk (any)
  • *Egg Wash to brush crust before baking *optional:
  • 1 egg yolk + 1 teaspoon water or milk/cream

For the Filling

  • 6 cups fresh or frozen blueberries (do not thaw if using frozen) or use a mix of different berries
  • 1 small apple , grated (my favourite is Granny Smith or Golden Delicious)
  • 2 teaspoons fresh lemon juice
  • 1/2 cup granulated sugar
  • 1/4 cup brown or coconut sugar (you can use all-- 3/4 cup--coconut sugar if preferred)
  • 3 tablespoons maple syrup
  • 2 teaspoons cinnamon
  • 3 tablespoons tapioca starch/flour (or use cornstarch, if preferred)
  • pinch of sea salt
  • 1/2 tablespoons vanilla bean extract , or regular vanilla extract is fine
  • 3 tablespoons butter , cut into pieces

Instructions

DIRECTIONS

For the Crust (if using storebought or your own, go to the next step)

  1. In large bowl combine the flour, sugar, salt, and cinnamon. Add cold, grated butter and mix lightly until combined. Add in lemon juice or apple cider vinegar and egg and mix together. Gradually add in cold water or milk, about a tablespoon at a time until the mixture looks dough-y and sticks together (I often do it gradually because it's easy to go overboard and then the dough its too wet). Add in a bit more flour if that happen.

    Roll into a flat disc and put in freezer for a bit to let the dough relax and for the butter to get 'cold' again (helps with flakiness) while you prepare the filling.

For the Filling:

  1.  set aside about 1 cup of berries to put on top of pie after it's cooked


  2. Place 2 12 cups blueberries (or half/half if you are doing a combined blueberry/cherry pie) in saucepan over medium heat and cook until the berries half broken down and they become saucy. I use a fork or potato masher to help break them down. The mixture should reduce by approximately a third to a half, usually in about 10 minutes or so. Allow to cool slightly. *While this is not a mandatory step, I always do this because it takes some of the 'water' out of the filling and adds a condensed sauce to the pie filling. Skip this step if you just want to cut time and use all 5 cups in the next step.

  3. Grate apple and squeeze some of the moisture out with a cloth or paper towel.
  4. In a large bowl add the remaining berries 2 1/2 cups (or 5 1/2 cups if skipping the step above), grated apple, lemon juice, sugars, maple syrup, cinnamon, salt, tapioca starch, salt and vanilla. Add your cooked berry filling, if using (from step 1). Set aside.


  5. Roll out pie dough and put into a 9" pie plate. Scoop filling into shell. Scatter the 3 tablespoons of (cold) pieces of butter on top of filling. Place lattice or a full crust on top, if using. I generally bake my shapes/pastry letters separately. Place in freezer for about 15 minutes.
  6. While your pie is chilling, preheat oven to 400F. Remove pie from freezer and brush egg wash along crust sides and top or lattices, if using.

    Bake at 400F for 15-20 minutes then reduce heat to 350F and cook for another 30 minutes or so, or until filling is bubbling and crust is a nice golden brown. I use a pie shield (or tin foil around top crust sides) for the last 1/2 of baking if the crust is getting brown too quickly.

    Allow pie to cool for at least an hour or two, at room temperature. If desired, add some fresh berries to the top of your pie when it has cooled. This adds a nice freshness to your pie. Enjoy!

Recipe Notes


As always, thanks for stopping by lovelies! I’ll be sharing my Niagara adventure and a butterscotch pie on my next post. Stay tuned 😀

Dana xo

Filed Under: family, Food, Food Network, Geeky Pies, Ontario Road Trip, road trip, Road Trips, Writing

Copyright © 2025 · Foodie Pro Theme by Shay Bocks · Built on the Genesis Framework · Powered by WordPress