• Skip to primary navigation
  • Skip to main content

Pies & Prejudice

Adventures of a Geeky Pie Baker

  • About
  • My Geeky Pies
  • My road trips

Ontario Road Trip

End of Summer, Coffee & Pumpkin Spice Latte PIE!

September 18, 2018 by Pies & Prejudice 14 Comments

Hi Folks! I hope you all had a wonderful weekend. I can’t believe it was the last one of the summer. Where did the season go? How are we into mid-September already? I bet you are asking the same questions.

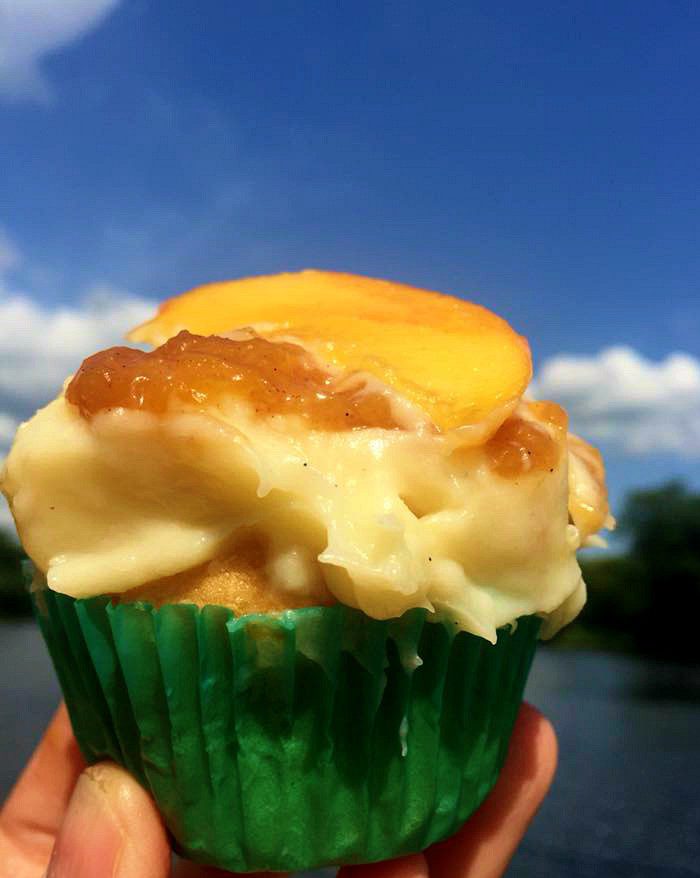
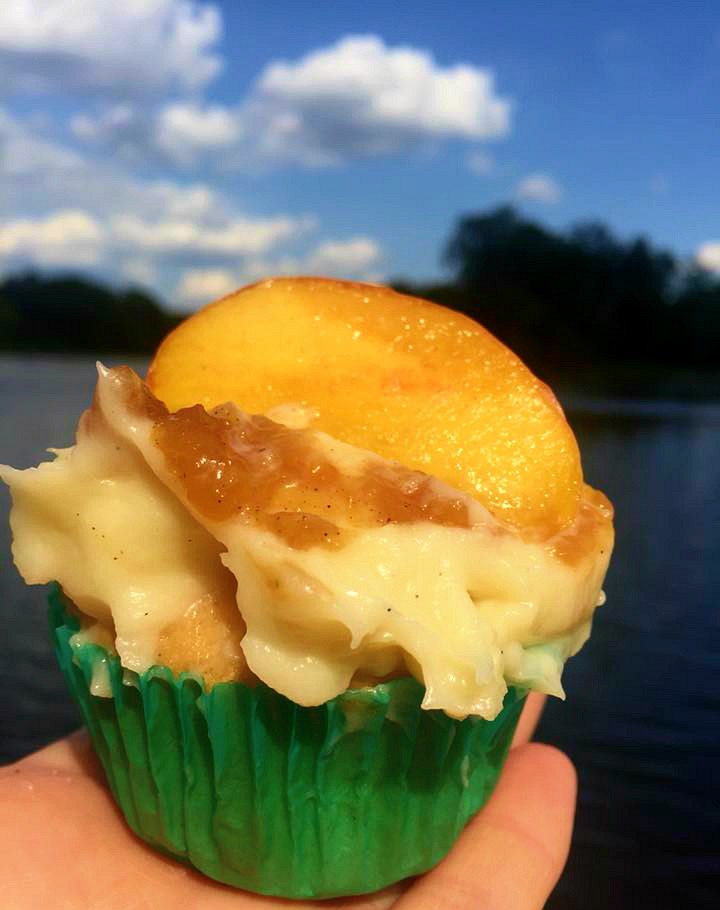
I’m going to interrupt the recent peach programming (Peach Pie, Peach Cupcakes) on my blog lately to bring you something completely different. Anyone else have pumpkin on the brain these days?

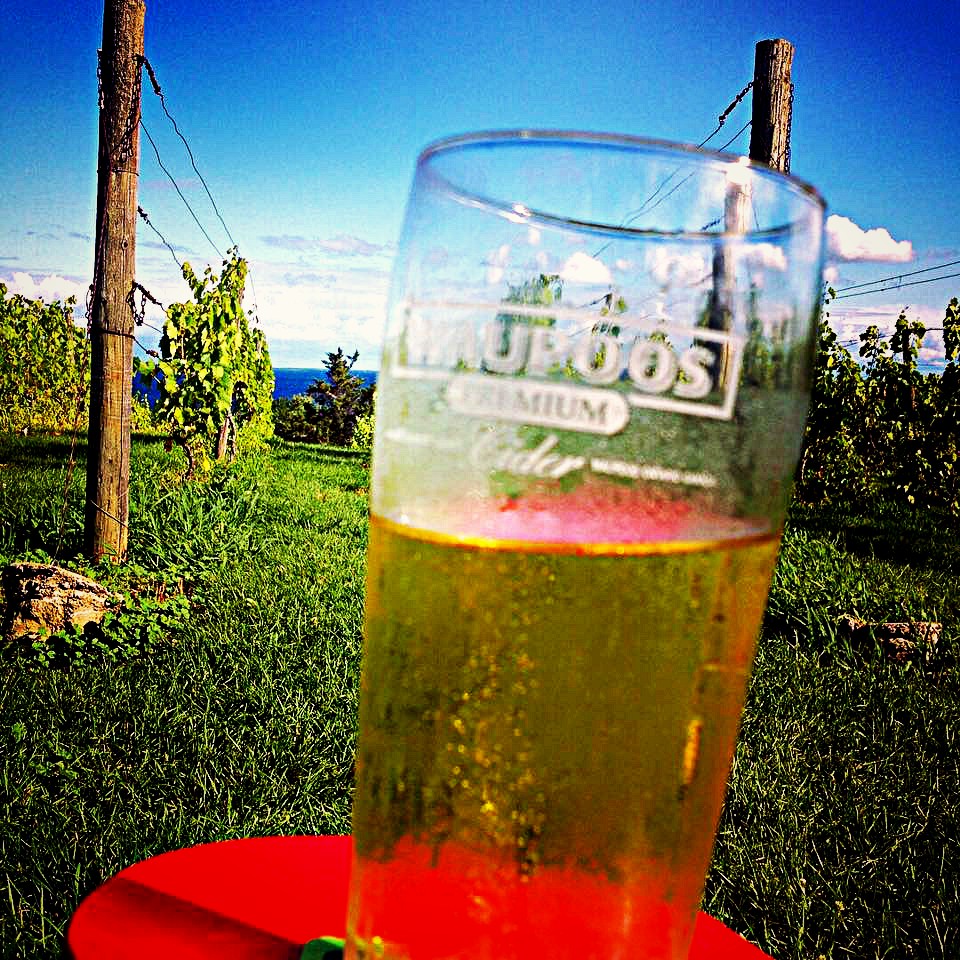
Well if you were in Ottawa last weekend, you probably did. We had a cold snap and it only reached 13C (8 overnight! Brrr) when it’s normally closer to 25C at this time of year. I think it was more of a shock to the system after a recent bout of 43 degrees.

But I really can’t complain about our weather because it could be a lot worse. I hope all my friends in the Carolinas are staying safe right now. The damage, flooding and destruction from Hurricane Florence is just devastating. I’ve been thinking of you and sending prayers your way xo.

Well, summer is back with a vengeance here in Ottawa (it was 40 degrees here yesterday!) and we still have a couple of days left to enjoy it. But I’m already in pumpkin mode and there’s no going back.

Don’t tell the Anti-Pumpkin Spice Police, but I even ordered my first PSL of the season last weekend. I was meeting a friend at Starbucks and it was a bit chilly out so I caved. Plus, I figured that if Mother Nature is going to make me wear jeans and a sweater —when it’s still summer –then it should be okay to order a pumpkin coffee, right? (Come on fellow pumpkin lovers, I know you’ve got my back).

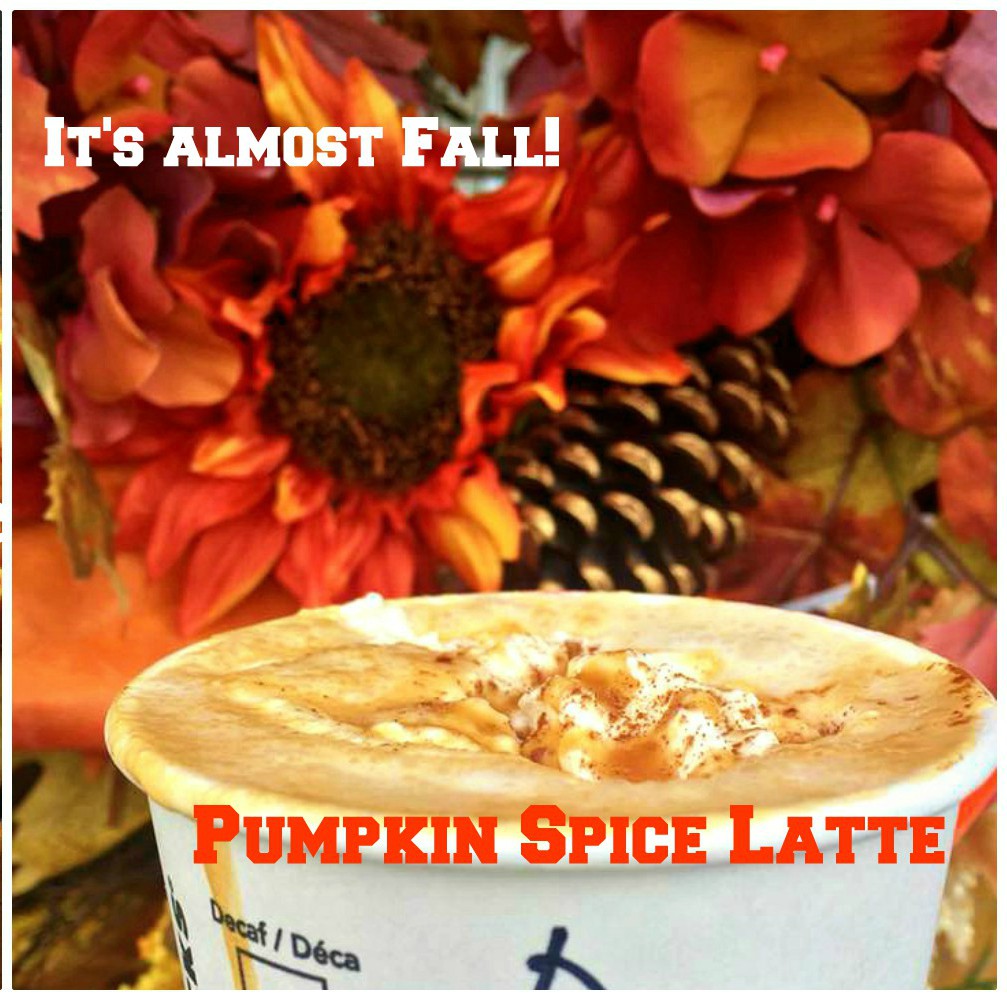
We sat on the patio sipping coffee and soaking up the sun while we caught up, it was just perfect. Our summers up here aren’t long enough as it is, so a bit of chilly weather ain’t gonna keep us indoors. Plus, we had our pumpkin coffees to keep us warm 😀

And I didn’t stop there. I also baked my first pumpkin pie of the season as well. And not just any pumpkin pie, I made one based on my favourite fall drink. 

Behold:  The Pumpkin Spice Latte PIE!

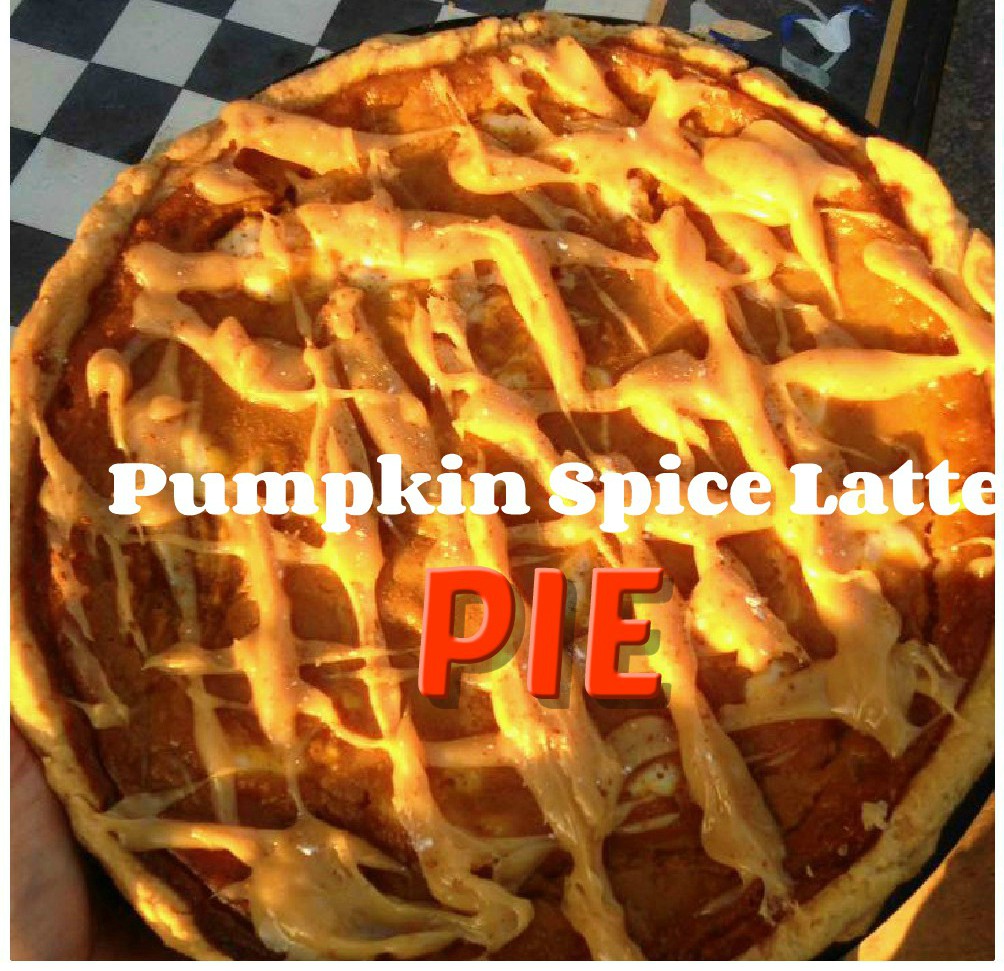
It tastes exactly like the drink, but in pie form. (Take that Starbucks! he he)

The pumpkin filling (made with roasted pumpkin) is swirled with a vanilla bean cheesecake mixture to resemble the ‘foam’ on the drink, and then I sprinkled it with more pumpkin spice (cinnamon and fresh nutmeg) to bring out the pumpkin-y goodness. After baking it, I let it cool and then drizzled it generously with salted caramel. SO GOOD! Make this pie (recipe below post) and you might never go to Starbucks again (well, for the fancy drink, anyway). 

The Story of the Famous Pumpkin Spice Latte

I find there are basically two kinds of people: 1)Those who love pumpkin spice and, 2) those who hate it.

With Fall just around the corner, the anti-Pumpkin Spice jokes are now out in full force. They started as soon as ‘the drink’ came out for the season, not too surprisingly. Some are funny and quite clever, such as this sign for an Oil Change company I saw recently that says: ‘It’s Back… Pumpkin Spice Oil Change! hahaha

You can laugh all you want at us pumpkin fanatics, but deep down I bet you’re secretly a pumpkin spice fan, too. Sure you may not imbibe in pumpkin lattes regularly, but I’ll bet you’re the first to dive into a pumpkin pie at Thanksgiving, right? I knew it! Don’t worry, your secret is safe with me (maybe). If you don’t really like pumpkin, then I think you’re just crazy. Just sayin’…
…

Read More »

Filed Under: Food, Food Network, friends, Geeky Pies, Ontario Road Trip

Just Peachy! Bourbon Peach Cupcakes

August 20, 2018 by Pies & Prejudice 9 Comments

Juicy peaches, creamy buttercream and a generous glug of bourbon….all in one delicious treat? YES PLEASE.

Let’s celebrate the end of summer with a Bourbon Peach Cupcake, shall we? Even better if you’re sitting by the lake with a view to go along with it #nottooshabby


Happy Monday, all! Or, more specifically…happy CUPCAKE MONDAY! (sorry I’m shouting but I can’t help myself when there’s cupcakes involved).

We’re having a Cupcake party today and you’re invited!

My friends’ Kelsie @The Itsy Bitsy Kitchen & Zainab @A Classic Twist came up with this marvelous idea to start off (every) Monday with cupcakes and now it’s an official Instagram hashtag.  I can’t think of a better way to start off the week… can you?

If you’re a cupcake fanatic as well, join in the fun! My bloggers friends and I have come up with some delicious cupcake creations (see the end of this post for links) that will have you in the kitchen whipping up a batch in no time. Or suddenly craving cupcakes, anyway… (haha).

While I do make pies more than anything else these days, I still do lovvvvvve a good cupcake–especially fun, delicious cupcakes with seasonal fruits (or..chocolate).

As you may have guessed by these cupcakes (and my recent Peach Pie), I’m all about the peaches these days. Being fairly close to the Niagara region definitely has its perks.  Did you know Niagara grows more than 80% of Canada’s peaches? Our markets are now overflowing with these scrumptious beauties so it’s the perfect excuse to bake all of the peachy desserts.

Peaches are one of my favourite fruits (peach pie is one of my top faves, actually), but–sadly– I can’t eat too many of them at once because they bother my digestive system. Peaches, and other stone fruit, are a high fodmap food which some folks (such as myself) are very sensitive to. If I eat 2 big slices of peach pie, I will sound like a trucker for a week (trust me, it’s not pretty). Luckily I share my baking creations with friends often– that way I don’t eat them all myself 😀 (thank goodness).

If you’re a peach fan like me, you don’t need to stop at peach pie or cupcakes, either. How about a glass of peach wine? Oh yeah!!!

If you find yourself in Niagara, mosey on over to Konzelmann Estate Winery where you can sample the most amazing peach wine. It’s worth the trip alone—even if you’re not a big wine drinker.  Their peach wine tastes like summer in a glass…


Not a big wine fan? Ok, let’s go for a peach cider instead.

We’re gonna head over to County Cider in Picton, Ontario (Prince Edward County in South Eastern Ontario) and grab a pint while relaxing on one of their Adirondack chairs. And the view of the lake is just a bonus!

Now this is how you summer.


So, enough peachy booze. Let’s get back to peach cupcakes….

There’s not too much you can do to improve a fresh peach pie or cupcake unless, of course, you add bourbon (back to the booze—oops! Hmmm, you’d almost think I was a hardcore drinker reading this post haha).

Like my peach pie, I decided to throw some bourbon into my peach filling and loved how it really took the flavour up a notch. There’s just something about the combination of bourbon and peach that is quite magical. Now if you’re from the south, I’m probably preaching for nothing because you probably only ever eat peaches with a few glugs of bourbon, right? 🙂 (silly question, I know).


I took my favourite vanilla bean cupcake (GF), filled with a spoonful of homemade bourbon peach pie filling and then topped it with a cream cheese buttercream, a fresh peach slice and then drizzled some more filling on top. It’s creamy, boozy PEACH perfection!

If you’re on the peach bandwagon, like me, you’ll lovvvve these cupcakes. I’m pretty sure they will make your Monday better….or any other day of the week, really. But this is a pretty good excuse reason to get your cupcake on…. just sayin’.

The only thing better than peach cupcakes (peach wine, peach cider, peach pie…etc etc) on a hot summer day? Hanging out with a bunch of cute furry friends at the lake. Before I share my peach cupcake recipe and my blogger friends’ links, here are a few pics of puppies and flowers around the lake–just for fun.

Cupcakes AND puppies? There simply isn’t a better way to spend your MONDAY.

Dogs for days! Definitely not a bad day at ‘the office’ 🙂

Want some more cupcake inspiration? Join us for a #CUPCAKEMONDAYS party. Here are a few more cupcake creations I think you’ll love. Click through the links to see the recipes.  And don’t forget to check out hashtag on Instagram for endless cupcake inspiration. You’re gonna love Mondays from now on, we promise!

Chocolate Banana Cupcakes from Itsy Bitsy Kitchen  

Brown Sugar Toffee Cupcakes from Kelly Lynn’s Sweets and Treats

Piñata Cupcakes from A Table Full of Joy

Chocolate Cherry Chip Cupcakes from Love in My Oven

Mojito Cupcakes from Nourish and Fete

Thanks for stopping by and have a great week, everyone!

Dana xo

5 from 2 votes
Print

Bourbon Peach Cupcakes

Delicious vanilla cupcakes with a bourbon peach filling and topped with a cream cheese buttercream. It's summer in cupcake form!

Ingredients

Ingredients

For the Vanilla Cupcakes

  • 1 ½ cups Gluten-Free flour Packaged or your own mix
  • ¾ cup sugar
  • 1 ½ teaspoons baking powder
  • 1 teaspoon xanthan gum omit if it's in your flour mix
  • ½ teaspoon salt
  • ½ cup butter room temp
  • 2 large eggs room temp
  • ½ cup milk any--cow almond, cashew, coconut etc.
  • 1 Tablespoon vanilla bean extract or reg vanilla

For the Cream Cheese Buttercream

  • 1 cup butter room temp
  • 1 package 8 ounce cream cheese, softened
  • 2 cups powdered sugar or use more if you like your frosting really sweet
  • 1 Teaspoon lemon juice
  • 1 Tablespoon vanilla bean extract or regular vanilla

For the Bourbon Peach Filling

  • 3 fresh peaches chopped
  • 1/4 cup brown sugar
  • 1/4 cup water
  • 1 Tablespoon bourbon
  • 1 Tablespoon salted butter
  • 1/2 teaspoon cinnamon
  • 1 Tablespoon Cornstarch + 2 Tablespoons water
  • 1/2 tablespoon vanilla bean extract or regular vanilla

Instructions

Instructions

For the Bourbon Peach Filling:

  1. In medium saucepan place peaches, water, sugar, bourbon, and cinnamon. Cook over low heat until peaches soften and absorb the liquid.
  2. Whisk together cornstarch and 2 Tablespoons water in a small bowl.Gradually add to the peach mixture, stirring constantly. When mixture thickens, add butter and vanilla. The peach mixture should have a jam texture.
  3. Remove from heat and allow to cool in the fridge until ready to fill cupcakes.

For the Vanilla Cupcakes:

  1. Preheat oven to 350F. Line a cupcake pan with cupcake liners.
  2. In medium bowl add flour mix and whisk well (I always whisk gluten-free flour really well first), then add sugar, baking powder and salt.
  3. Add butter to the flour/sugar mixture and, with a hand mixer, beat on low-speed until thoroughly mixed. It will be crumb-like in texture, similar to coarse sand. Add in the eggs, one at a time, and mix until blended.
  4. Pour in the vanilla and then slowly add milk. Beat on medium for about a minute or so, until batter is fairly smooth (since GF flours don't contain gluten, you don't have to worry too much about over-mixing). If batter's too thick, gradually add an extra couple of teaspoons milk (you probably won't have to add extra milk if you're using reg vanilla extract). Batter should resemble a soft frosting when it comes together.
  5. Fill liners with batter to almost ¾ full. Bake for about 17-20 minutes--but I usually check them in about 15 minutes. When they're slightly golden and a toothpick inserted comes out clean, they're done. Allow them to cool completely.

For the Cream Cheese Frosting:

  1. Using a mixer, beat the butter on high for a minute or two until it's really creamy.
  2. Lower mixer speed and gradually add confectioners sugar. I add about a half cup at a time to gradually incorporate the sugar into the butter (and it's less messy that way, too).
  3. Add cream cheese (yes, after the sugar) and mix only until incorporated and smooth (you don't want to over beat once you've added the cream cheese).
  4. Add lemon juice and vanilla extract and mix until combined. Place in fridge until ready to decorate cupcakes.

To Assemble Cupcakes:

  1. Hallow out the centre of each cupcake. Fill with cooled peach mixture--about a tablespoon per cake (or enough to mostly fill the hole). You can use a pastry bag or a small spoon works quite well, too. Reserve a few spoonfuls of the filling for the top, if desired.
  2. Frost cupcakes and drizzle reserved peach filling on top of each cupcake.
  3. Garnish with a slice of peach, if desired. Enjoy!

Filed Under: Deep South, Food, Food Network, friends, Geeky Pies, Ontario Road Trip, road trip

Summer, Cherry Pie Cupcakes and 80s Flashback

August 27, 2017 by Pies & Prejudice 8 Comments

Hi guys, I hope you’re having a fabulous summer 🌞

How the heck are we almost at the end of August already? Seriously. It feels like it was only a few weeks ago that we ‘celebrated’ Summer Solstice. Yes those quotes are intentional because while the solstice marks the official start of summer and it’s the longest day of the year, it also means the days start getting shorter again. Wahhh! (I take my sunshine seriously, ya’ll).

We’re having the best summer ever here in Ottawa, though most of my local pals probably won’t agree (and might have even re-read that sentence to make sure they read it correctly haha). Sure, we’ve definitely had way too much rain but we haven’t had that much humidity this summer, thankfully. While I love me some summer heat (the hotter, the better), I just can’t stand the humidity. So this summer has been chock full of mostly hot days and cool nights, which is perfect to me. And my hair is very appreciative of the lack of humidity as well. Just sayin’. #frizzyhairproblems #the80scalledtheywanttheirhairback.

Who here likes cherry pie? I know, silliest question ever.

There’s something about a slice of fresh, homemade cherry pie that screams summer to me. But since you’ve probably already had lots of cherry pie already this summer (at least I hope you have), I thought I’d change it up and take cherry pie to a whole new level.

Behold: The Cherry Pie Cupcake. Heck yes!


(Recipe below this post)

A vanilla cupcake is slathered with a fresh cherry buttercream and then drizzled with cherry pie filling. It’s basically a combination of a cupcake and a slice of pie in one easy hand-held treat. How awesome is that? And, these cupcakes are actually quick & easy to make if you’ve already got some cherry pie filling leftover from your recent pie bake-a-thon.
What? You usually don’t bake one pie, let alone a bunch of them? Now who’s crazy? 🙂

Speaking of pie…this past July marked my very first PIE Anniversary! Yep, it was last year on Canada Day while making a Strawberry Balsamic pie for the festivities that I decided to forgo the usual lattice crust and do something a little different. I took advantage of the fact that the berry filling was red and created a Canadian flag out of the top pastry. It worked out deliciously well! Turns out there’s a whole other world beyond a lattice crust. Who knew? I was immediately hooked on pie design.

It didn’t take me long to start with the geeky pies, not too surprisingly (for those who know me, anyway). I made a Star Wars-themed pie for a friend’s birthday shortly after this one, and have made many a Superheroes/Star Trek/Star Wars pies in the past year. I’ve developed a Geeky Pie addiction, and not seeking any treatment for it whatsoever 🙂

This is one of my favourites: A Wonder Woman pie for the new movie– which came out this past Spring. It was my first time ‘drawing’ on pie crust and I had a lot of fun with it. Considering I hated art class in high school and I was pretty bad at it (worst marks, by far), my drawing isn’t all that terrible—surprisingly.

So, this year for Canada Day I made a fun pie to share with friends for our country’s 150th Birthday celebration.

Can you really get any more Canadian than a pie with a moose and a beaver in a canoe with a Timmies coffee? Probably not…


I also made a 4th of July pie for our lovely neighbours to the south. It’s a no-bake pie with fresh strawberries and blueberries and then I decorated it with pastry stars and whipped cream. It was deliciously American!

I also tried my hand at a braided pie crust. I’d been admiring all my lovely pie friends’ fantastic braided pies recently and just love the pretty effect. The braids especially stand out with a triple berry filling.


You guys might laugh at me but while I was standing in front of my pie with pastry strips all ready to braid, I drew a complete blank. Somehow I’d completely forgotten how to braid!! Crazy, right? As a kid I could braid with my eyes closed and probably in my sleep, too. My friends and I would braid each others’ hair all the time. I think it is (or was?) a rite of passage and a very popular pastime for a teenage girl. Mind you, I haven’t braided anyone’s hair (including my own) since 1989, so I guess it has been awhile. 

So I felt a bit silly entering ‘how to braid’ on the google machine but as soon as I watched the first 2 seconds of a Youtube video it all came back to me and I was braiding my pastry strips like a pro.

And then suddenly a huge wave of nostalgia swept over me and I was immediately transported to the summer of 1988 where I spent every. single. day at the pool hanging out with my friends. We’d sunbathe, swim, talk about boys, bugged the lifeguards (especially the ones we liked), AND braided each others’ hair. All whilst listening to the ballads of Corey Hart (swoon!) blaring from the radio. Ah, the good ole’ days. I miss the 80s…

Since I’m going down memory lane, and had also recently come across a few old photos, I thought I’d share a couple just for fun. Because who doesn’t like cheesy 80’s photos anyway, right?

This is my good friend Andrea and I sitting poolside while chatting and working on our tans. She was one of the lifeguards that I’d befriended and we kept in contact long after she moved to BC. She inspired me to become a lifeguard (a few years later) but the summers here at the pool just weren’t the same without her.


Would you believe that we actually slathered ourselves with BABY Oil in order to get the best tan ever? And sometimes (man, I can’t believe I’m actually admitting this), we even used Crisco Oil! I know….craZy! Thinking back, I can’t believe we actually thought that was a good idea (especially in this day and age with our sunscreen obsession) . But our tans were fabulous and we often smelled like french fries–which is never really a bad thing, right?

Don’t forget to also admire my “highlighted” hair. Anyone remember ‘Sun-in’? I know, orange is SO not my colour but it was all the rage back then. Oh and before we move on (to slightly embarrassing photo #2), don’t forget to check out my snazzy t-shirt I was wearing as well.

Yep, it’s Corey Hart! I got that shirt at his concert when he was here in Ottawa in the late 80s. It was my very first concert and I couldn’t talk for a few days afterward because of all the screaming we did. If you ever hear his version of ‘Rudolph the Red-Nosed Reindeer’ around the holidays, you may notice that it’s live. He recorded that song here in Ottawa, even though it was July. We were very confused when he started singing a Christmas song, but we still screamed for the entire duration of the song and if you listen closely, you might recognize my voice. Okay, maybe not… but I still enjoy hearing that song and remembering: ‘Wow, I was one of those crazy gals screaming at Corey while he’s singing Christmas songs in the middle of the freaking summer’ haha.

Here’s a photo of my girlfriends and I hanging out in the pool office. We were pretty fortunate the lifeguards liked us enough to let us in their private ‘office’. It seemed a lot more exciting at the time…


Oh and before you ask, that’s me on the far left with the football shirt and (almost) mullet. HA!  This was the very start of my tomboy phase. I hope you’re not laughing too hard. I thought I was cool at the time and I wore that shirt over my swim suit almost every day (when I wasn’t wearing my Corey Hart shirt, that is).

At this point you might be wondering…why did I even both to change my blog if the name is different but I’m still only sharing travel stuff and 80s pics? Well, my friends, I thought I’d ease you guys into the whole food blog thing before I start sharing a lot more of my recipes. I’m pretty sure you’ll come back again in hopes to see more cheey 80s photos though, right? hehe

Okay, here is the recipe for my Cherry Pie Cupcakes. Hope you guys enjoy them, and the rest of summer, too! I’ll be back with another recipe shortly. Pinky promise.

Dana xo


5 from 1 vote
Print

Cherry Pie Cupcakes

A cupcake and a pie in one! The perfect summer treat

Ingredients

For the Vanilla Cupcakes

  • 1 ½ cups Gluten-Free flour Packaged or your own mix
  • ¾ cup sugar
  • 1 ½ teaspoons baking powder
  • 1 teaspoon xanthan gum omit if it's in your flour mix
  • ½ teaspoon salt
  • ½ cup butter room temp
  • 2 large eggs room temp
  • ½ cup milk any--cow, almond, cashew, coconut etc.
  • 1 Tablespoon vanilla bean extract or reg vanilla

For the Cherry Pie Buttercream

  • 1 cup butter room temp
  • 2 cups powdered sugar or use more if you like your frosting sweet
  • 1 tablespoon or more whipping cream, coconut cream or milk
  • 1/2 tablespoon vanilla bean extract or regular vanilla
  • 1/3 cup Cherry Pie Filling- homemade or store-bought my simple recipe below

For the Cherry Pie Filling (if not using pre-made or store-bought filling)

  • 1 cup sweet or sour cherries if using frozen don't thaw first
  • 3 Tablespoons granulate sugar you can use brown or coconut sugar if preferred
  • 1 Tablespoon maple syrup or omit and add an extra tablespoon of your preferred sugar
  • 1 tsp cinnamon
  • 1 tablespoon tapioca starch
  • pinch sea salt
  • 1 teaspoon vanilla bean extract or regular vanilla

Instructions

  1. For the Cherry Pie Filling (if not using a pre-made or store bought pie filling):

    In large saucepan whisk together sugar, maple syrup (if using), cinnamon, sea salt, and tapioca. Add cherries (pitted first, if using fresh cherries) and mix into the sugar mixture. Cook over medium heat, stirring often. I often use a potato masher to break down the cherries while the sauce is cooking. When it begins to boil, cook for another minute or two until thickened. Remove from heat and add in vanilla. Use immediately or store in the fridge until ready to use for the buttercream and topping for the cupcakes.

For the Vanilla Cupcakes:

  1. Preheat oven to 350F. Line a cupcake pan with cupcake liners.
  2. In medium bowl add flour mix and whisk well (I always whisk gluten-free flour really well first), then add sugar, baking powder and salt.
  3. Add butter to the flour/sugar mixture and, with a hand mixer, beat on low-speed until thoroughly mixed. It will be crumb-like in texture, similar to coarse sand. Add in the eggs, one at a time, and mix until blended.
  4. Pour in the vanilla and then slowly add milk. Beat on medium for about a minute or so, until batter is fairly smooth (since GF flours don't contain gluten, you don't have to worry too much about over-mixing). If batter's too thick, gradually add an extra couple of teaspoons milk (you probably won't have to add extra milk if you're using reg vanilla extract). Batter should resemble a soft frosting when it comes together.
  5. Fill liners with batter to almost ¾ full. Bake for about 17-20 minutes--but I usually check them in about 15 minutes. When they're slightly golden and a toothpick inserted comes out clean, they're done. Allow them to cool completely.
  6. Frost with cherry buttercream (below) or your favourite frosting.

For the Frosting:

  1. Using a mixer, beat the butter on high for a minute or two.
  2. Turn speed to low and add confectioners sugar--but only a half cup at a time to gradually incorporate the sugar into the butter. Add salt.
  3. Slowly mix in vanilla extract and cream (or milk) and cherry pie filling and continue to beat on medium-high for a minute or two. After it comes together, increase speed to high and continue to beat for several more minutes (aim for 5 or more minutes, for best results).
  4. Frost cupcakes and drizzle each with reserved cherry pie filling.


Filed Under: 80s, family, Food, Geeky Pies, Ontario Road Trip, Road Trips, Writing

Spring Road Trip and Maple Blueberry Pie

June 13, 2017 by Pies & Prejudice 10 Comments

Hey guys, how is your spring going so far?

Spring is my (only) favourite season so I reallllly don’t want it zipping along so fast thankyouverymuch. If it were up to me, I’d be more than okay with spring all year-long. Just sayin’…

So in attempt to extend spring, I made this Maple Blueberry Pie. Can’t hurt, right? We just wrapped up our Tulip Festival not too long ago so I thought it’d be fun to add a pretty tulip. You’re probably surprised to see that there is no Pac-Man or a Superhero on this pie, right? (I get that a lot).

(scroll to the recipe below if you don’t want to read my ramblings—WHAT?? That’s crazy talk).

Thank you ALL so much for coming to check out my new blog, all the positive feedback and your messages and comments on my blog and social media. It’s super fantastic. I’m very happy to finally share more recipes with you guys, too (don’t worry, my geek theme is optional). Been a long time coming…

So far it’s been a fabulous Spring so far and, as always, it’s been absolutely gorgeous here in my hometown (Ottawa). Our world-famous Tulip Festival just ended (if you missed my post last spring, read about our tulips here) and I managed to get a few nice pics of the tulips again this year. If you’re coming to Ottawa for a visit, I strongly recommend planning your trip in May. This is thee best time to see the tulips in full bloom, and it’s usually too early for the hot, sticky weather as well (huge bonus!).

One thing is for sure, you’ll love our gorgeous, colourful tulips. The gardens are sure a sight to behold…

This also happens to be my ‘office’ as I also work outdoors. Not too shabby at all, right? #selfemployment #perks

I’ve also done quite a bit of travelling this spring as well…2 road trips already, and it’s not even summer yet (crazy, right?).

In April my guy and I went to Vermont for Maple Fest (post coming soon), and then during the May long weekend we went to Niagara-on-the-lake for the holiday and to also celebrate my birthday. We had a fabulous trip!

Since we haven’t been on a proper road trip since last summer, I knew I couldn’t wait until the Fall to get outta dodge. Desperation really starts to kick in when it’s been almost a month year since I last roadtrip’d (ha ha).

While I don’t travel nearly as much as I used to (hence the new blog theme), my guy’s work closed down for a couple of months (for renovations) this spring so we decided to sneak away for a bit. He figured it was a good time to use his summer vacation while it’s quieter (he still did occasional private parties in the basement). By travelling during this time, he now won’t have to burn any time off during the busy summer season. So we probably won’t be going anywhere ’til early Fall, when we’ll likely head to the East Coast visit his folks.

There is no better place to kick off the first unofficial weekend of Summer (Victoria Day weekend in May) than Niagara-on-the-Lake! This was my 3rd time visiting and it was more stunning than ever. I’m not at all surprised that NOTL is considered ‘The Most Beautiful Town in Canada’.
As soon as you get here, you won’t want to leave…


The town is chock full of tulips, lilacs and every other flower under the sun at this time of year.

I’m a complete lilac addict. It’s actually bordering on a problem because as soon as I come across them, I’ve got my face stuck in the flowers to give them a good sniff. I probably look crazy(er), but I just can’t stop. There has gotta be a LA (Lilacs Anonymous) group for this, right? Probably only runs for the month of May though….haha

And, of course, this is wine country so you could spend all your time going from one vineyard to the other, and sipping a glass of wine on a garden patio in between tours.

Even if you don’t like wine, the scenery alone is worth the visit here


We did a few wine tours, a couple of brewery tours and ate LOADS of amazing food as well.


There are also loads of scenic areas for bike rides and nice walks.

I’ll be doing a full recap post on our Niagara adventure soon! If you haven’t been there yet, hopefully I can encourage you to check it out. Just a warning though….this place can be completely addicting (almost as much as chocolate…or lilacs)

We also did the boat trip under Niagara Falls, so you’re guaranteed to see some fun pics in my next post. Let’s just say I would have been LESS soaked if I’ve gone over the falls in the barrel like I was hoping to do (silly rules/by-law restrictions).

BTW, if anyone from the Niagara Falls Tourism Board is reading this, you guys really need to hire Superman to give free rides over the Falls. If that doesn’t boost tourist to the area, I don’t know what else will (um, not that you need any help really….the place has been packed anytime I’ve been there).
The movie Superman (the 2nd one, actually) is one of my favourite flicks, so I may be biased. Anyone else think of Lois and Clark while visiting the Falls?…. or am I just crazy? (um, maybe don’t answer that question).

Here’s a sneak peek into our fun at the Falls. This is right before Billy threw me over the railing (I only wish I were kidding :D).

So…. let’s get down to the most important thing about this post (well, besides Superman)… how about a PIE?

Oh look at that, I’ve combined pie AND superman. Whoops. How did that happen? It’s a bird…it’s a plane…no, it’s a….. BLUEBERRY PIE?


*The Superman logo is optional, but it will definitely win you points with your geek friends (like me! haha).

This is one of my new favourite pies. It’s a baked pie but with added fresh berries on top  after it’s cooled. Throwing on some fresh berries is a little easier if you’re not using a top crust, of course. I usually make fancy pastry shapes or words and place them on top afterward. If you decide to do a top lattice, just throw a few berries around the lattice strips.

I’ve also used a combo of other berries to make this pie. You can just use whatever you like or have on hand. Blueberry and cherries are a fabulous mix and a bit different from the usual combos–that’s what I used in the Superman pie (above). Like most pies, the berries are fairly versatile.
So… let’s get on with our pie baking fun, shall we?

(I’m working on my recipe format, please bear with me! thanks 🙂 

Print

Maple Blueberry Pie (baked & fresh)

A delicious baked blueberry (or a combo of berries) pie with fresh berries thrown on top for a more 'fresh' taste during off-season. So yummy and versatile, too.

Course Dessert
Prep Time 1 minute
Servings 6
Author Dana, Pies & Prejudice

Ingredients

CRUST

Pie Crust for a single 9" pie (*Double if you want a top crust, lattice or shapes)

  • 1 1/2 cups GF Flour (your own mix, Bob's GF flour, cup4cup etc)
  • 1 teaspoon sugar
  • 1/2 teaspoon salt
  • *pinch of cinnamon (optional but adds a really nice flavour)
  • 1/2 cup cold/frozen butter , grated
  • 1 tablespoon lemon juice or apple cider vinegar
  • 1 egg
  • 2-4 tablespoons very cold water or milk (any)
  • *Egg Wash to brush crust before baking *optional:
  • 1 egg yolk + 1 teaspoon water or milk/cream

For the Filling

  • 6 cups fresh or frozen blueberries (do not thaw if using frozen) or use a mix of different berries
  • 1 small apple , grated (my favourite is Granny Smith or Golden Delicious)
  • 2 teaspoons fresh lemon juice
  • 1/2 cup granulated sugar
  • 1/4 cup brown or coconut sugar (you can use all-- 3/4 cup--coconut sugar if preferred)
  • 3 tablespoons maple syrup
  • 2 teaspoons cinnamon
  • 3 tablespoons tapioca starch/flour (or use cornstarch, if preferred)
  • pinch of sea salt
  • 1/2 tablespoons vanilla bean extract , or regular vanilla extract is fine
  • 3 tablespoons butter , cut into pieces

Instructions

DIRECTIONS

For the Crust (if using storebought or your own, go to the next step)

  1. In large bowl combine the flour, sugar, salt, and cinnamon. Add cold, grated butter and mix lightly until combined. Add in lemon juice or apple cider vinegar and egg and mix together. Gradually add in cold water or milk, about a tablespoon at a time until the mixture looks dough-y and sticks together (I often do it gradually because it's easy to go overboard and then the dough its too wet). Add in a bit more flour if that happen.

    Roll into a flat disc and put in freezer for a bit to let the dough relax and for the butter to get 'cold' again (helps with flakiness) while you prepare the filling.

For the Filling:

  1.  set aside about 1 cup of berries to put on top of pie after it's cooked


  2. Place 2 12 cups blueberries (or half/half if you are doing a combined blueberry/cherry pie) in saucepan over medium heat and cook until the berries half broken down and they become saucy. I use a fork or potato masher to help break them down. The mixture should reduce by approximately a third to a half, usually in about 10 minutes or so. Allow to cool slightly. *While this is not a mandatory step, I always do this because it takes some of the 'water' out of the filling and adds a condensed sauce to the pie filling. Skip this step if you just want to cut time and use all 5 cups in the next step.

  3. Grate apple and squeeze some of the moisture out with a cloth or paper towel.
  4. In a large bowl add the remaining berries 2 1/2 cups (or 5 1/2 cups if skipping the step above), grated apple, lemon juice, sugars, maple syrup, cinnamon, salt, tapioca starch, salt and vanilla. Add your cooked berry filling, if using (from step 1). Set aside.


  5. Roll out pie dough and put into a 9" pie plate. Scoop filling into shell. Scatter the 3 tablespoons of (cold) pieces of butter on top of filling. Place lattice or a full crust on top, if using. I generally bake my shapes/pastry letters separately. Place in freezer for about 15 minutes.
  6. While your pie is chilling, preheat oven to 400F. Remove pie from freezer and brush egg wash along crust sides and top or lattices, if using.

    Bake at 400F for 15-20 minutes then reduce heat to 350F and cook for another 30 minutes or so, or until filling is bubbling and crust is a nice golden brown. I use a pie shield (or tin foil around top crust sides) for the last 1/2 of baking if the crust is getting brown too quickly.

    Allow pie to cool for at least an hour or two, at room temperature. If desired, add some fresh berries to the top of your pie when it has cooled. This adds a nice freshness to your pie. Enjoy!

Recipe Notes


As always, thanks for stopping by lovelies! I’ll be sharing my Niagara adventure and a butterscotch pie on my next post. Stay tuned 😀

Dana xo

Filed Under: family, Food, Food Network, Geeky Pies, Ontario Road Trip, road trip, Road Trips, Writing

Copyright © 2025 · Foodie Pro Theme by Shay Bocks · Built on the Genesis Framework · Powered by WordPress